

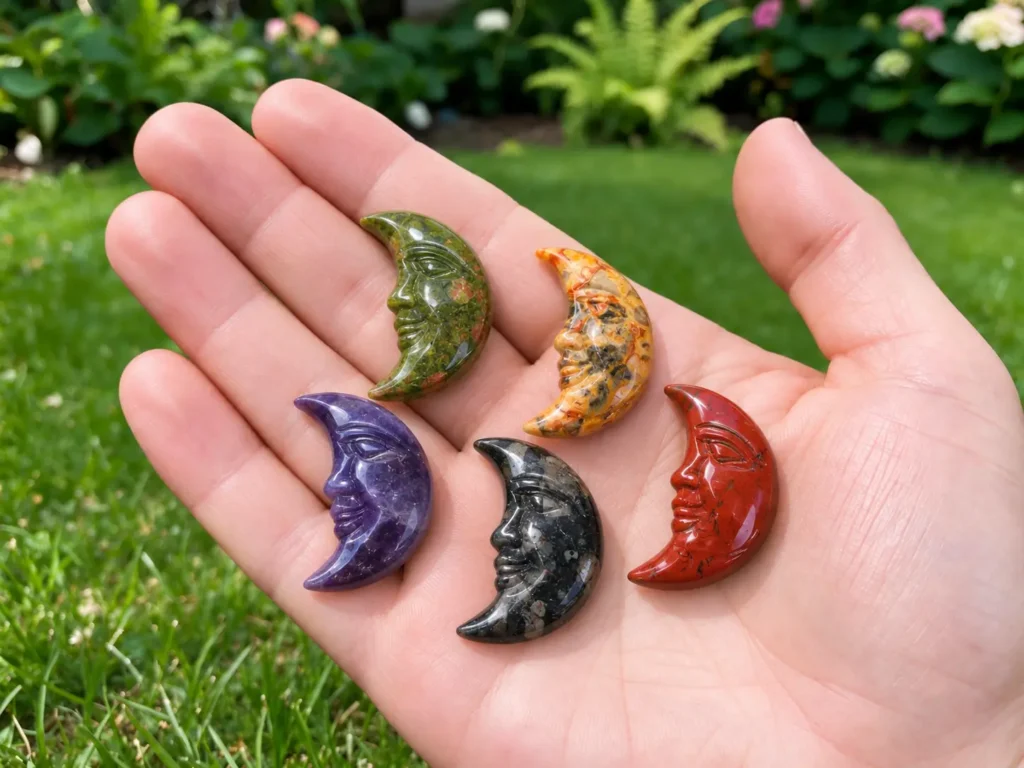
How to Carve a Gemstone Moon Face (DIY Lapidary Guide)
A carved gemstone moon face is a handcrafted mineral sculpture featuring a crescent moon silhouette with a dimensional profile face along the inner concave curve. Sculpted facial landmarks including an arched brow ridge, sunken eyelid, curved nose, lips, and rounded chin transform mineral slabs into tactile art pieces. Whether displayed as a pocket stone, wire-wrapped into a pendant, or showcased in a collection, learning how to carve a gemstone moon face advances rockhounds from flat cabochons into figurative relief carving.
Unlike cabbing or flat grinding, sculpting facial anatomy into solid stone requires managing negative space, relief depth, and mineral brittle points. Natural silicates lack the forgiveness of carving wax, demanding light diamond burr contact, water lubrication, and progressive grit smoothing to protect thin horn tips. In our workshop at Rock Tumble Lab, our team tested multiple silicate roughs to establish a repeatable carving roadmap. Whether you have explored our projects on how to make gemstone dice, how to make a chakra stone car hanging, or how to make an inlaid gemstone pendant, relief carving introduces organic contouring. For studio inquiries, visit our about page or contact our lapidary staff through our contact page.
Key Takeaways
- Preform Size: An 8 mm to 12 mm slab measuring 45×18 mm, providing depth for 3.0 mm facial relief.
- Silhouette Truing: Diamond trim saw for radial kerfs, plus 180 and 360-grit wheels for crescent curves.
- Rotary Setup: Flex shaft machine at 5,500 to 7,500 RPM with diamond cylinder, ball, and flame burrs.
- Water Cooling: Submerge in water to trap silica dust and prevent micro-cracking.
- Anatomical Ratios: Establish the nose apex first as the highest relief, then excavate eye sockets, lips, and chin.
- Polishing: Smoothing with 400, 600, and 1200-grit rubber points, followed by cerium oxide or diamond polish.
Essential Materials for Carving a Gemstone Moon Face
Sculpting facial contours out of hard minerals requires dependable cutting tools and solid stone blanks. When learning how to carve a gemstone moon face, selecting tough cryptocrystalline silicates without internal fracture planes ensures that nose bridges and horn tips will not shear under rotary pressures.
Selecting Mineral Slabs for Crescent Moon Face Carvings
Stone selection dictates how cleanly fine details hold their shape. Cryptocrystalline quartz varieties (Mohs 6.5 to 7.0) provide superior cohesion, resisting edge chipping while taking a mirror polish. Avoid porous sandstones or minerals with pronounced cleavage planes like calcite.
| Mineral Variety | Mohs Hardness | Fracture / Cleavage Traits | Practical Workbench Carving Guidance |
|---|---|---|---|
| Bloodstone (Fancy Jasper) | 6.5 – 7.0 | Conchoidal / Tough | Dark green chalcedony with red jasper spots. Dense matrix supports fine lip lines and horn tips without crumbling. |
| Red Jasper | 6.5 – 7.0 | Conchoidal / Dense | Opaque microcrystalline quartz. Carves smoothly with minimal chipping; takes a glassy polish across facial curves. |
| Crazy Lace / Mookaite Agate | 6.5 – 7.0 | Conchoidal / Tough | Banded chalcedony with gold, white, and red tones. Banding highlights cheeks and brow arches naturally. |
| Green Aventurine | 7.0 | Granular / Tough | Translucent quartz with chrome mica platelets. Tough matrix withstands rotary carving without flaking. |
| Sodalite | 5.5 – 6.0 | Poor Cleavage | Rich royal blue with calcite veins. Carves quickly; keep rotary speeds under 6,000 RPM to protect veins. |
| Unakite | 6.0 – 7.0 | Granular / Mixed | Green epidote and salmon feldspar blend. Carve with light feeds to manage grain hardness variations. |
| Dalmatian Stone | 5.5 – 6.0 | Granular / Tough | Creamy matrix with black arfvedsonite spots. Fine grain carves cleanly into spotted moon profiles. |
Inspect slabs over backlighting for fractures or thermal checks. For mineral profiles, review the GIA Gem Encyclopedia and geological data from the USGS Mineral Resources Program. If prepping rough from river stones, our guide on rock tumbling media explains how ceramic media prevents bruising.
If you need raw agates, jasper, or bulk quartz crystals to slab and shape into crescent moon blanks, here are top-rated options:




Rotary Tooling and Diamond Burrs: How to Carve a Gemstone Moon Face
Executing fine facial features in hard rock demands rotary carving gear with diamond points:
- Flexible Shaft Machine: A flexible shaft rotary tool with foot-pedal control (Foredom SR) operating at 4,000 to 9,000 RPM without vibration.
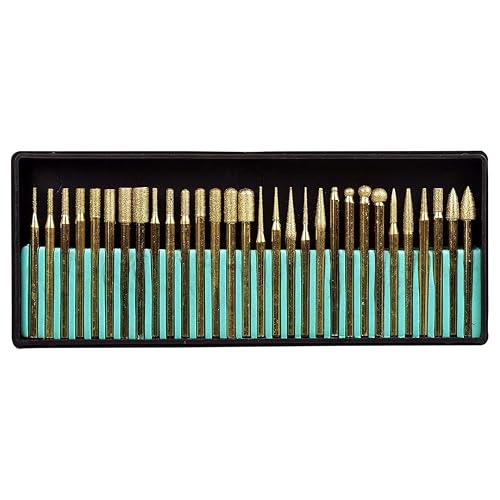
- Diamond Cylinder Burrs (2.0 mm to 3.0 mm): Cylinder diamond burrs (120 to 180 grit) for excavating background stone along the concave arc.
- Diamond Ball Burrs (1.0 mm, 1.5 mm, 2.5 mm): Diamond ball burrs (1.0 mm, 1.5 mm, 2.5 mm) for dishing out eye sockets, cheeks, and nostrils.
- Diamond Flame and Knife-Edge Burrs: Diamond flame burrs (240 to 320 grit) for cutting eyelid creases, nostril seams, and lip lines.
- Water Carving Basin: A shallow plastic tray with a rubber resting pad to keep the stone submerged under 3 mm to 5 mm of water.
- Bench Magnifier or Optivisor: An optical visor (2.5x to 3.5x) to monitor micro-fractures and burr depth.
Contour Smoothing Points, Polishing Pastes, and Safety Gear
Bridging rough rotary carving and glassy polishing requires dedicated smoothing abrasives:
- Rubberized Silicon Carbide Points: Rubberized silicon carbide points in 400, 600, and 1200 grit to erase rotary chatter grooves.
- Hardwood Dowels and Felt Carving Points: Hardwood pegs charged with 3,000, 8,000, and 50,000-grit diamond paste for tight detail polishing.
- Optical Cerium Oxide Slurry: Optical cerium oxide mixed with water for buffing quartz and jasper faces to a high gloss.
- Personal Protection Equipment: Safety glasses, ear protection, and a fitted N95 or P100 respirator mask.
Step-by-Step Lapidary Process: How to Carve a Gemstone Moon Face
Carving stone is a subtractive craft where every cut is permanent. Working from broad outer silhouettes down into facial details prevents accidental over-cutting and preserves proportions.
Workshop Benchmarks: How to Carve a Gemstone Moon Face
Our workshop technicians tracked metrics across multiple moon carvings to identify optimal parameters:
| Carving Phase | Selected Tooling | Rotary / Wheel Speed | Coolant Protocol | Observed Failure Modes & Fixes |
|---|---|---|---|---|
| Slab Preform Trimming | 6-Inch Diamond Trim Saw | 1,725 RPM | Continuous water bath | Blade binding: Cut radial relief kerfs into concave arc. |
| Silhouette Edge Truing | 180 & 360-Grit Cabbing Wheels | 800 – 1,000 RPM | Steady water drip | Tip snap: Grind toward tip center rather than off the edge. |
| Rough Facial Excavation | 2.5 mm Diamond Cylinder Burr | 6,000 – 7,000 RPM | Submerged water bath | Gouging: Keep burr moving in sweeping cross-hatch strokes. |
| Feature Sculpting (Nose/Eye) | 1.5 mm Diamond Ball Burr | 6,500 – 7,500 RPM | Submerged light pulses | Nose chipping: Leave nose 0.5 mm thicker until final smoothing. |
| Line Engraving (Lips/Eyelid) | Fine Diamond Flame Burr | 5,500 – 6,500 RPM | Shallow water immersion | Burr skitter: Scribe guide lines with an aluminum scribe. |
| Chatter Line Smoothing | 600-Grit Rubberized Point | 4,500 – 5,500 RPM | Light wet contact | Heat scorch: Avoid heavy pressure; let abrasive grains cut. |
| Detail Mirror Buffing | Felt Bob with Cerium Oxide | 3,500 – 4,500 RPM | Damp slurry paste | Slurry drying: Mist workpiece periodically with clean water. |
Step 1: Scribing the Crescent Template onto the Mineral Slab
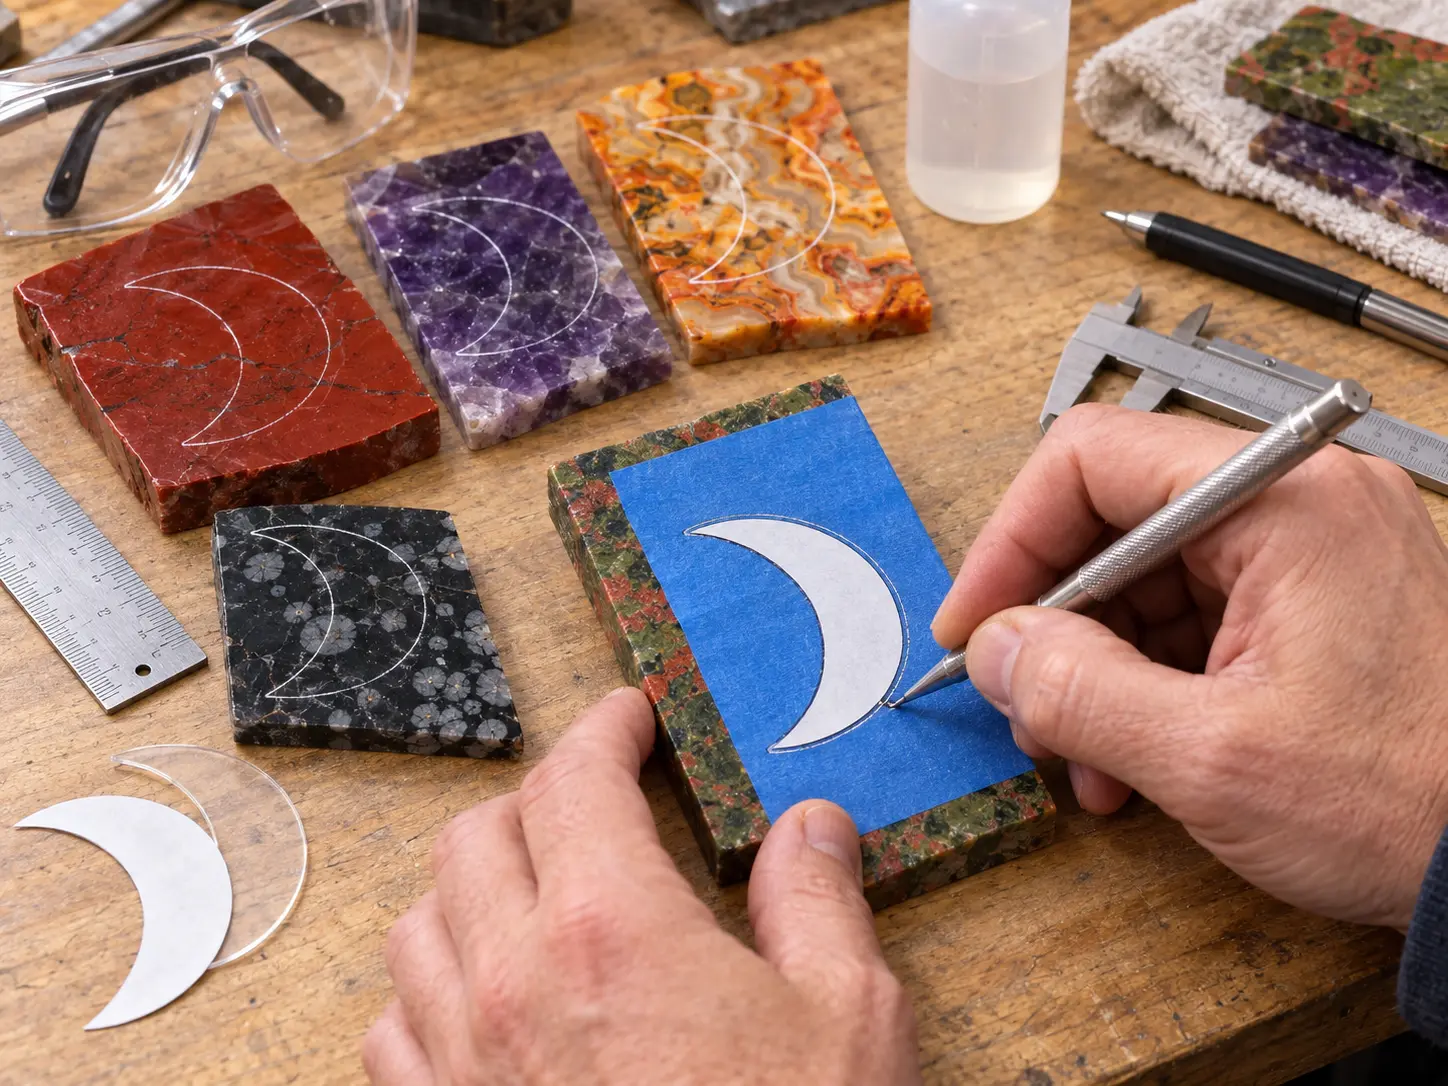
When learning how to carve a gemstone moon face, an accurate initial layout ensures balanced proportions between crescent horns and facial profile:
- Calibrate Slab Thickness: Select an 8 mm to 12 mm slab. Slabs under 6 mm lack depth for relief, while slabs over 15 mm require excessive grinding.
- Prepare the Surface: Degrease the slab with 99% isopropyl alcohol. Apply painter tape to improve pencil contrast.
- Trace Crescent Profile: Trace a crescent template measuring 45 mm tip-to-tip, with an outer convex radius of 30 mm and a belly width of 16 mm to 18 mm.
- Scribe Permanent Outline: Scribe firmly over template lines with an aluminum scribe. Scribed lines stay visible underwater. Peel tape.
Step 2: Rough-Sawing the Profile and Cutting Concave Relief Kerfs
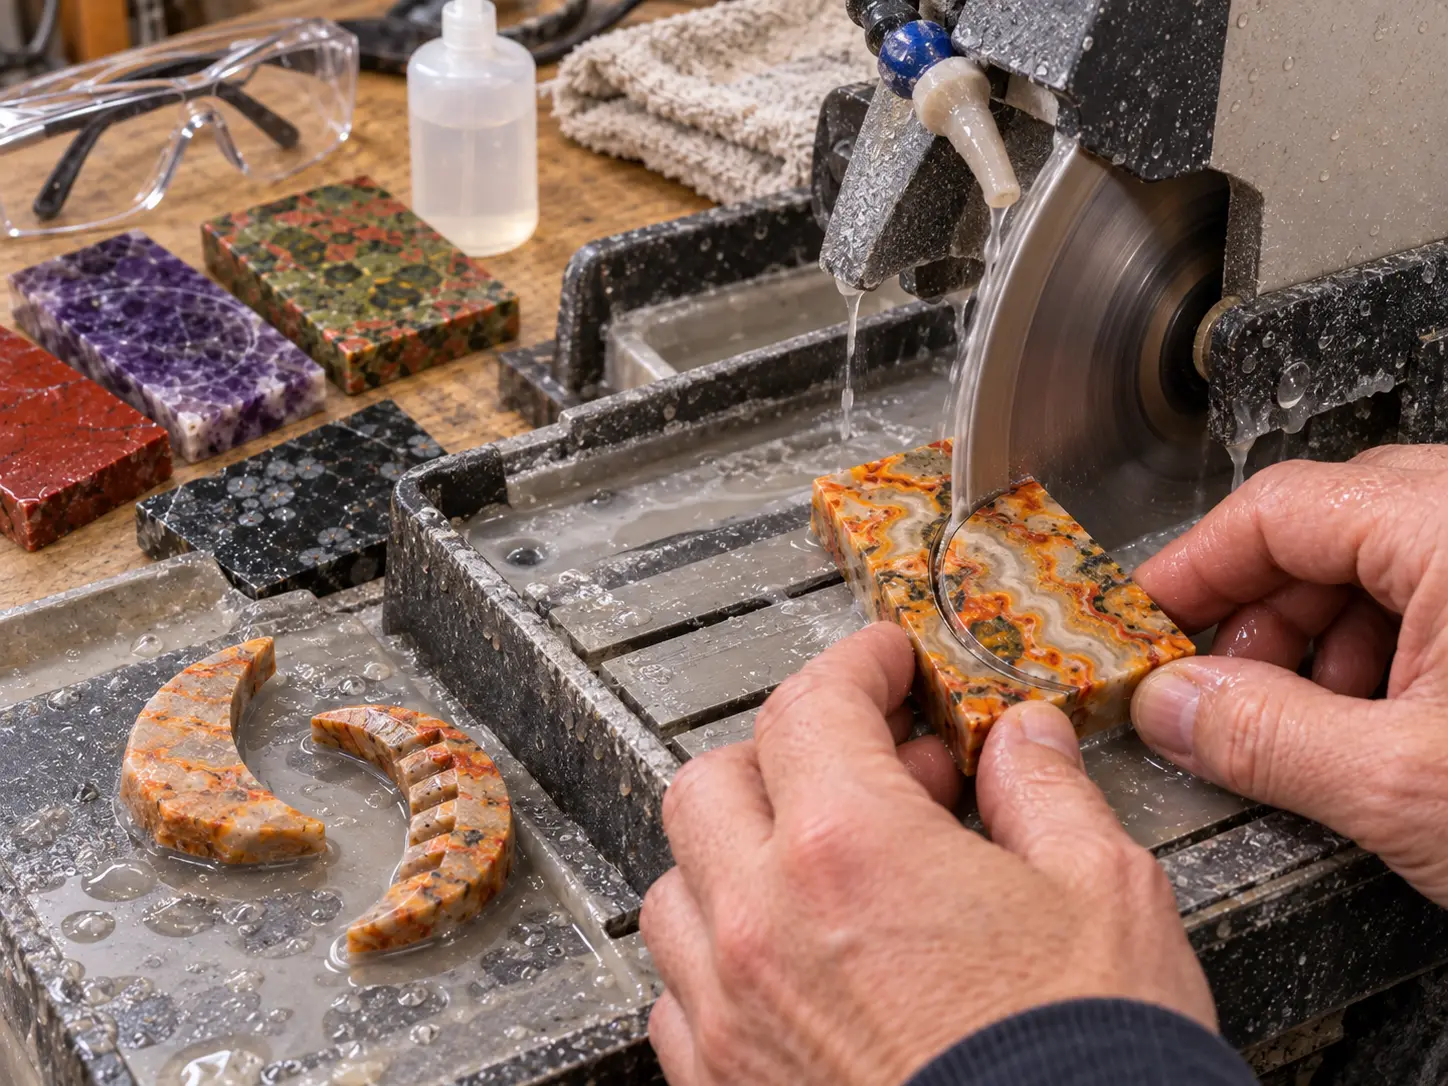
Sawing a concave curve on a diamond trim saw requires relief cuts to prevent pinching the blade:
- Outer Convex Cut: Make tangential cuts along the outer convex arc to remove corners, then sweep gently to rough out the curve.
- Radial Relief Kerfs: Cut five to six parallel relief kerfs from the scrap margin straight to the concave outline, stopping 1 mm before the scribed line.
- Nibble Concave Waste: Nibble away stone segments between relief cuts with light saw passes or tap them gently with pliers.
- Wash and Inspect: Rinse in clean water to remove slurry, confirming horn tips remain intact with 1 mm safety margin.
Step 3: Grinding the Silhouette and Tapering the Horns on a Cabbing Wheel
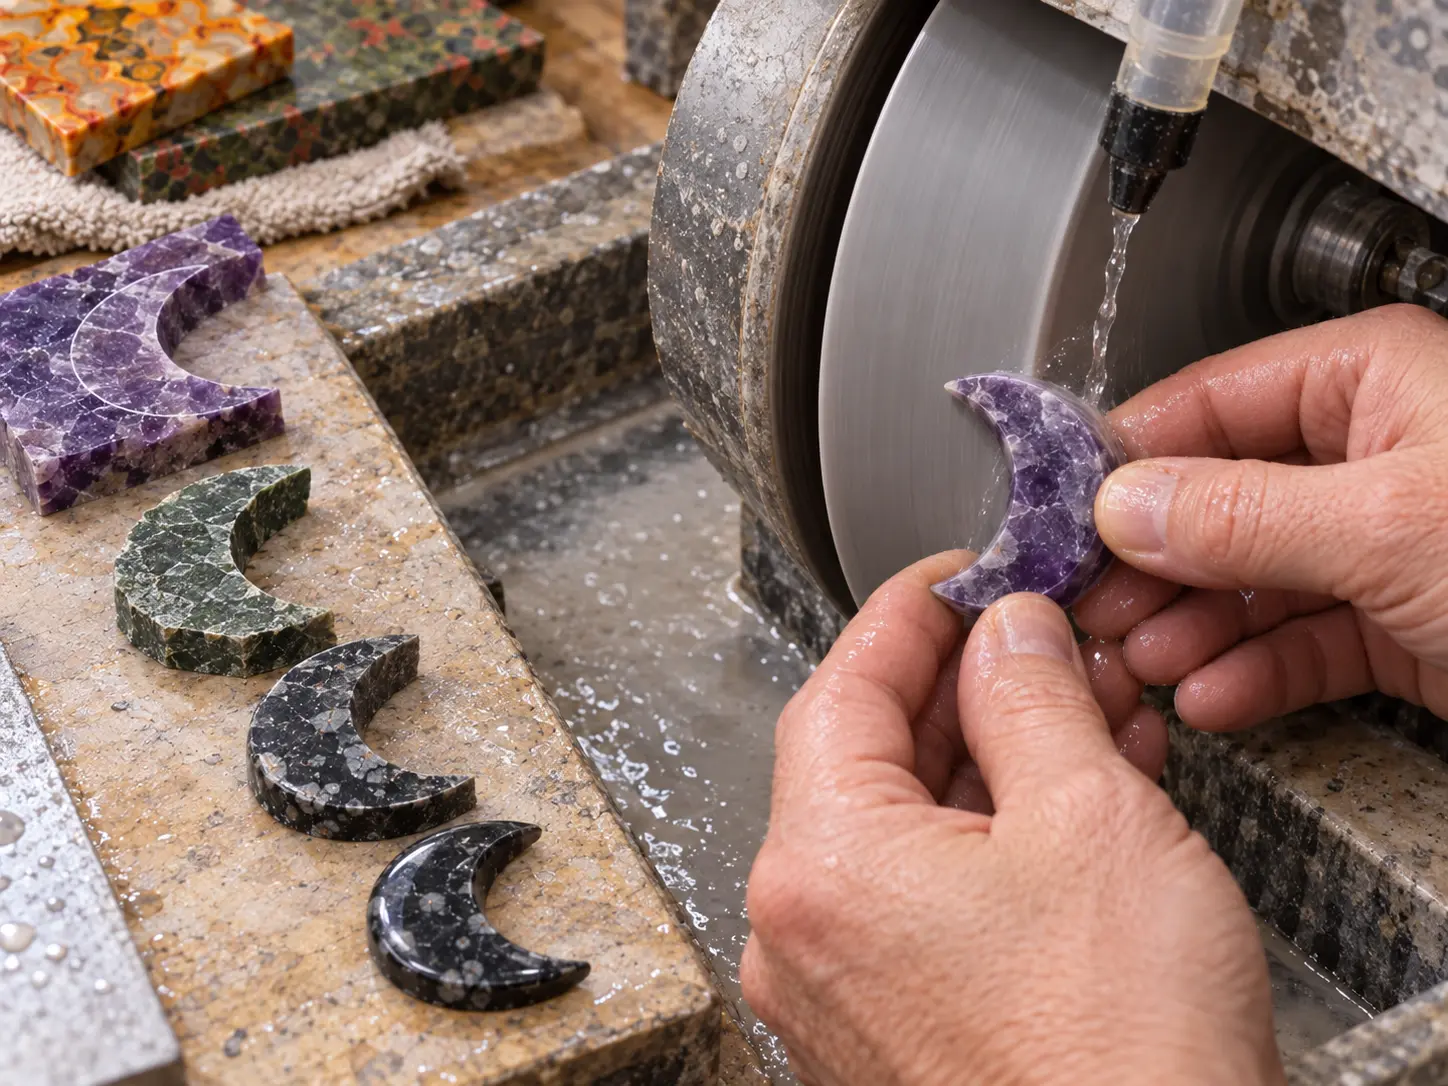
Smooth rough sawn edges into continuous curves before starting internal relief carving:
- Smooth the Outer Arc: Run the convex back across a 180-grit wheel under water until saw facets merge into a sweeping arc.
- Shape the Inner Crescent: Use the radiused edge of a 180-grit wheel to grind the concave inner face to the scribed profile line.
- Taper the Horn Tips: Bevel both ends into tapered horns. Always grind from the tip inward toward the body to prevent fractures.
- Refine to 360 Grit: Pass faces and edges across a 360-grit wheel to remove coarse scratches. For silhouette grinding methods, see our guide on how to make a gemstone heart pendant.
Step 4: Mapping Facial Anatomy: Brow, Nose, Lips, and Chin Landmarks
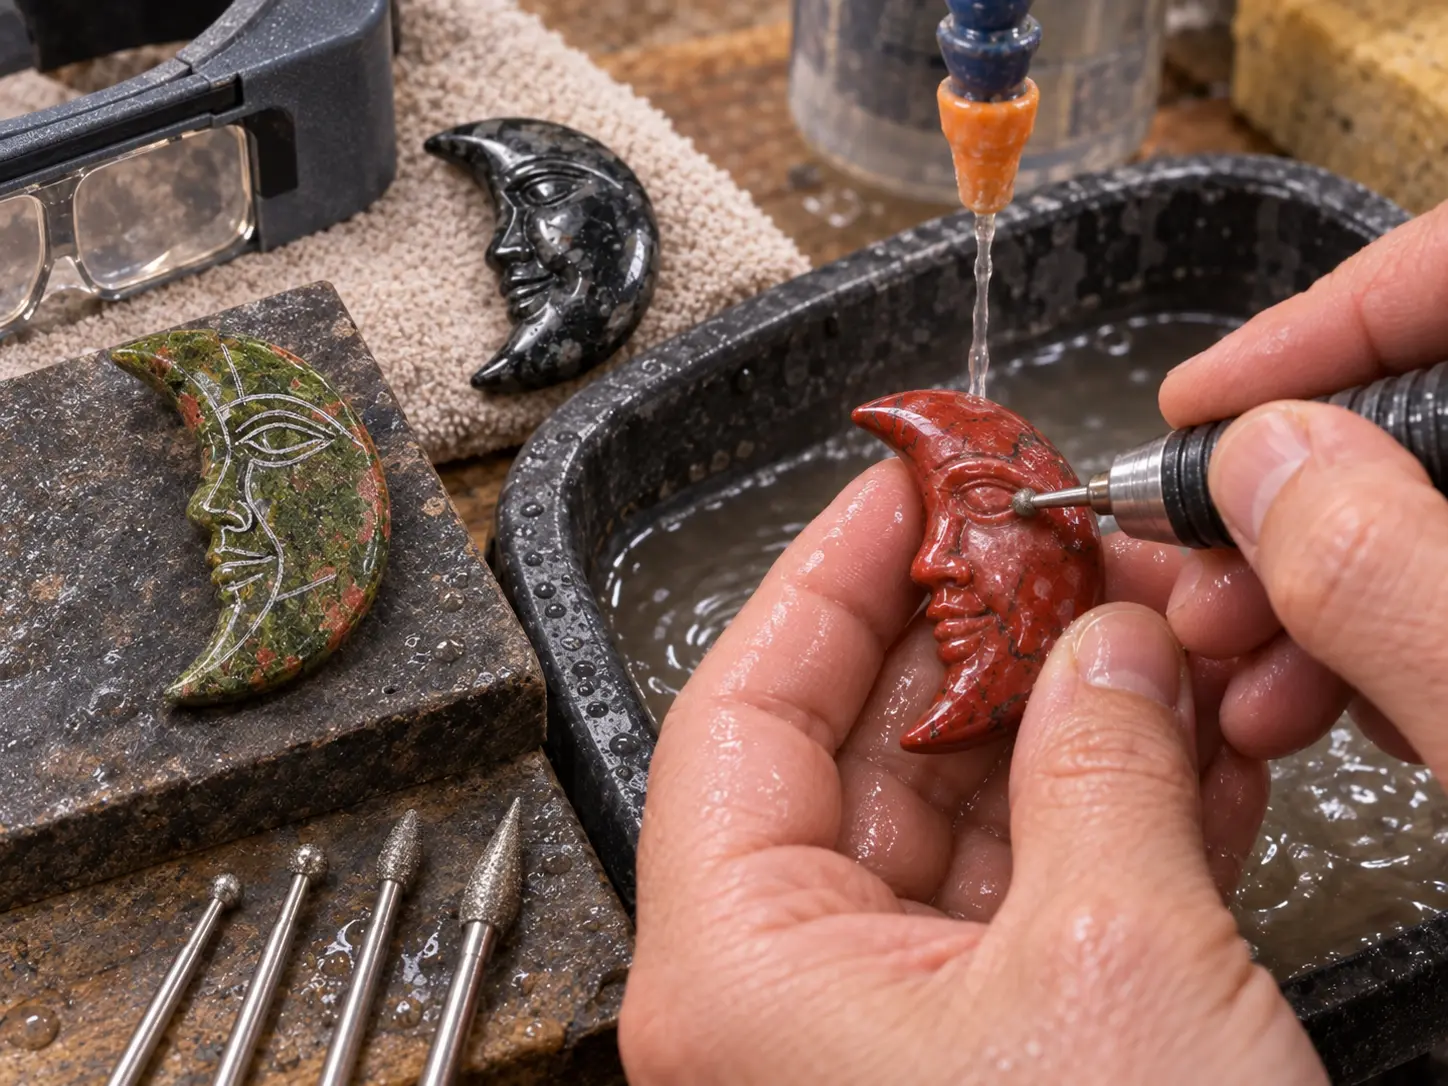
Accurate facial proportions are essential to carving an expressive, serene moon face:
- Divide into Thirds: Draw four horizontal registration marks along the inner concave arc with a water-resistant marker:
- Top Horn (0% to 25% height): Forehead slope tapering to upper horn.
- Brow & Eye (25% to 50% height): Eyebrow ridge and sunken eye socket.
- Nose (50% to 70% height): Curved nose projection and nostril wing.
- Mouth & Chin (70% to 90% height): Philtrum dip, lips, and rounded chin pad.
- Bottom Horn (90% to 100% height): Jaw taper blending into lower horn point.
- Mark Nose Profile Height: Mark the nose tip as the highest relief landmark, projecting 3.5 mm to 4.0 mm proud of the recessed cheek plane.
- Scribe Contour Lines: Score the brow line, nose bridge, nostril, lip line, and chin with an aluminum scribe so marks stay sharp underwater.
For excavating delicate facial contours, sculpting lifelike eyelids and lips, and maintaining vibration-free control, these rotary flex-shaft attachments and diamond burr sets are essential:


Step 5: Excavating Relief Depths and Sculpting the Profile Features
With landmarks mapped, begin dimensional carving with diamond burrs in a shallow water dish:
- Submerge Workpiece: Rest the stone on a rubber pad under 3 mm of clean water to suppress dust and absorb tool vibration.
- Recess the Forehead and Cheek: Using a 2.5 mm cylinder burr at 6,500 RPM, mill 1.5 mm of stone from cheek hollows, leaving nose and brow standing proud.
- Carve the Eye Socket Cavity: With a 1.5 mm ball burr, dish out an oval hollow beneath the brow to 1.0 mm depth, forming a raised ridge for the closed eyelid.
- Shape the Nose Bridge and Tip: Use a 2.0 mm cylinder burr to round the nose bridge down to the tip, tapering sides inward to create realistic walls.
- Carve the Mouth and Chin Relief: Mill a 1.0 mm channel beneath the nose for the upper lip. Use a 2.0 mm ball burr to round the lower lip and hollow the chin groove beneath, letting the chin project.
Step 6: Fine Detailing the Eyelid, Nostril Flare, and Lip Seam
Refine rough anatomical forms into crisp, life-like facial details:
- Cut the Lip Parting Line: Chuck a flame burr at 6,000 RPM. Make a light pass between lips, curving downward at mouth corners for a calm expression.
- Define the Eyelid Seam: Score an arched crease dividing upper and lower eyelids across the eye hollow with the flame burr.
- Hollow the Nostril Curve: Touch a 1.0 mm ball burr at the nostril-cheek junction to carve an undercut wing. For relief techniques, see our guide on how to make a fluted gemstone heart pendant.
Step 7: Erasing Tool Chatter with Rubberized Points and Wet Sanding
Rotary burrs leave miniature chatter ridges that ruin reflections if not systematically removed:
- Coarse Rubber Smoothing: Mount a 400-grit rubber point at 5,000 RPM under water. Sweep across carved facial contours to blend burr steps into flowing curves.
- Medium Smoothing (600 Grit): Switch to a 600-grit rubber point. Work around eye cavities, nose, and lips until grinding marks vanish under a 10x loupe.
- Fine Pre-Polish (1200 Grit): Pass a 1200-grit rubber point over the relief face and back dome until silky satin-smooth. For contour smoothing fundamentals, see our guide on DIY gemstone worry stones.
Step 8: Final Buffing and Mirror-Polishing with Cerium Oxide
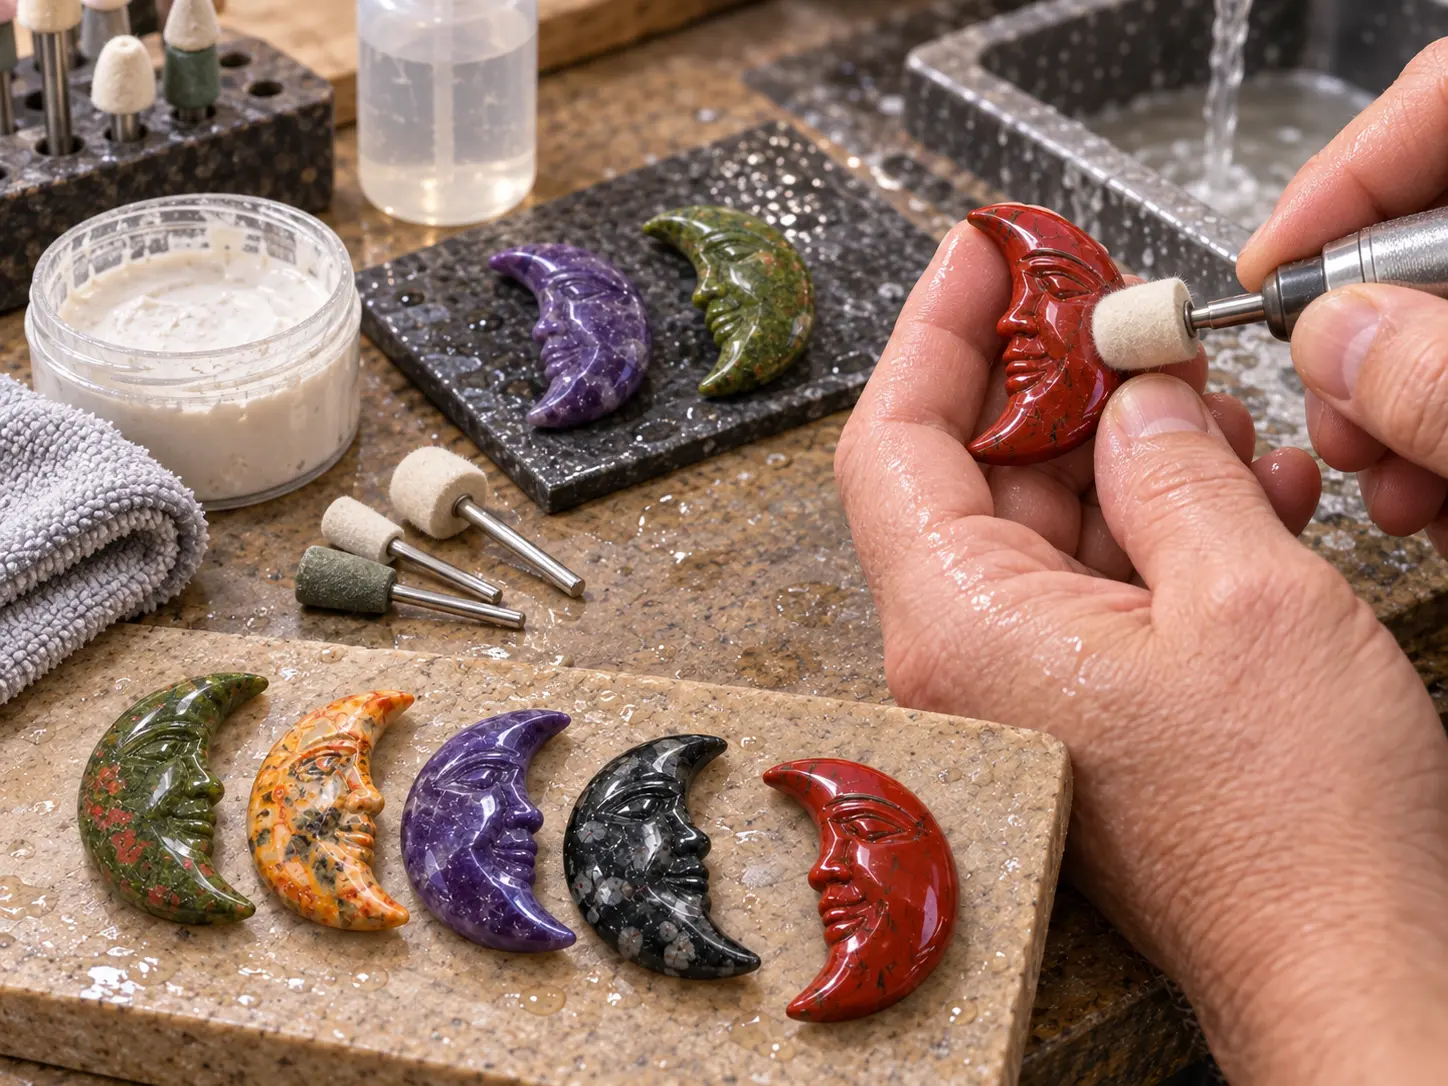
Bring out the color depth and glassy luster of your carved mineral:
- Clean Workpiece: Wash the stone in soapy water or an ultrasonic cleaner to dislodge abrasive particles from facial creases.
- Charge Felt Bob with Cerium Oxide: Mix optical cerium oxide with water into a slurry. Coat a miniature felt bob mounted in your flex shaft.
- Buff Facial Contours: Run the tool at 3,500 to 4,500 RPM, moving the felt bob continuously over facial curves for 2 to 3 minutes while keeping the zone damp.
- Detail Polish Tight Creases: For deep nostril and eyelid seams, charge a hardwood toothpick with 50,000-grit diamond paste and buff by hand for gloss in every crevice.
- Final Wash: Rinse with clean warm water and dry with a microfiber cloth. Your gemstone moon face carving is complete.
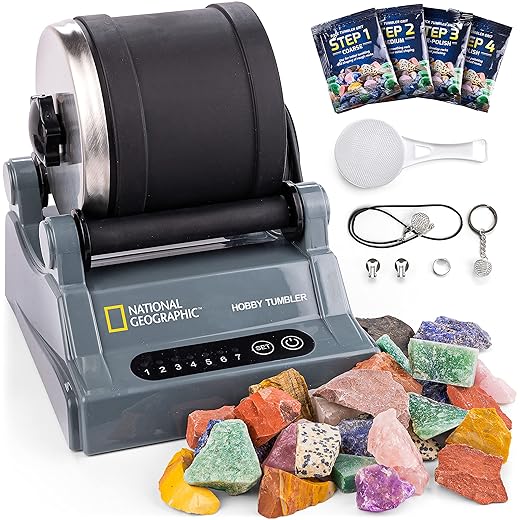
To polish intricate facial recesses to a mirror finish with diamond paste, true flat reverse planes, or tumble lapidary offcuts, here are top-performing polishing compounds, flat laps, and rock tumblers:


Troubleshooting Common Carving Defects on Gemstone Moon Faces
Figurative lapidary carving presents distinct challenges due to irregular mineral structures. Use this troubleshooting guide to correct carving defects:
| Defect Encountered | Probable Root Cause | Practical Workbench Correction |
|---|---|---|
| Horn Tip Snaps During Grinding | Grinding pressure directed off the tip edge or aggressive feeds. | Grind inward toward the crescent body; keep tips blunted until final 1200-grit smoothing. |
| Nose Bridge Fractures Off | Excessive rotary tool pressure or dry carving friction. | Submerge workpiece in water; let diamond abrasives cut freely without forcing handpiece pressure. |
| Eye Sockets Look Asymmetric | Carving freehand without measuring depth landmarks. | Measure socket depths with caliper depth gauge; check facial symmetry under raking side light. |
| Lip Crease Looks Jagged | Wandering flame burr or rotary chatter under low RPM. | Steady wrists on the basin rim; run flame burr at 6,500 RPM and score guide lines first. |
| Dull Patches in Facial Crevices | Felt bob was too large to reach into recessed grooves. | Use shaped hardwood dowels with 50,000-grit diamond paste to polish tight interior angles. |
| Stone Develops White Clouding | Thermal shock from localized friction overheating. | Keep the carving zone submerged under water; never grind minerals dry. |
For additional lapidary carving and tumbled stone craft projects, explore our guides on how to make an inlaid gemstone heart pendant and how to make a chakra stone car hanging.
Frequently Asked Questions About How to Carve a Gemstone Moon Face
What Rotary Speed Is Best When Learning How to Carve a Gemstone Moon Face?
When learning how to carve a gemstone moon face, optimal rotary speed for quartz and silicates (Mohs 6.0 to 7.0) is 5,500 to 7,500 RPM. Running below 5,000 RPM causes burr chatter that chips delicate edges. Running above 8,500 RPM flings water away from the burr, creating friction heat that cracks brittle stones.
Which Minerals Are Easiest for Beginners Learning How to Carve a Gemstone Moon Face?
Start with microcrystalline quartz like red jasper, bloodstone, or aventurine. These stones have uniform hardness, lack cleavage planes, and carve smoothly without flaking. Avoid calcite or fluorite on early attempts. For preform prep, see our rock tumbling beginner’s guide.
How Do You Prevent the Delicate Horn Tips from Snapping While Carving?
Prevent horn tip fractures with three rules: maintain 1.5 mm tip thickness during rough grinding, grind inward toward the crescent belly, and leave final tip shaping to a 1200-grit rubber point.
Can You Carve a Gemstone Moon Face Without a Rotary Tool?
While hand files carve soft soapstone, carving hard silicates like jasper or agate requires rotary tools. Spinning diamond abrasives grind hard silicon matrices efficiently without severe hand strain.
Where Can I Learn More About Gemstone Properties and Rock Lapidary?
Explore mineral properties and lapidary references through the GIA Gem Encyclopedia. If you have questions about slab cutting, diamond burr selection, or tumbling batches, visit our about page or contact our team through our contact page.
 Love Rock Tumbling?
Have a question? Use the form above to submit your question or comment.
I love hearing from you and seeing what you made!