

Have you ever wondered how a jagged, dull stone from your backyard can become a brilliant, glass-like treasure? Many people find joy in the art of diy rock tumbling, a process that reveals the hidden beauty inside ordinary minerals. This hobby allows you to transform rough specimens into smooth, shiny tumbled rocks right in your own home.
Mastering this craft requires more than just a machine; it demands patience and a steady hand. Successful beginner rock tumbling relies on selecting the right materials and following a precise sequence of coarse, medium, and fine grits. Each stage of rock polishing plays a vital role in achieving that professional, mirror-like finish.
By maintaining consistent attention throughout the process, you will learn how to safely clean your equipment and reveal stunning results. Whether you are a curious hobbyist or a budding geologist, this guide provides the essential steps to ensure your success from start to finish.
What Rock Tumbling Does and What Beginners Need to Get Started
Rock tumbling is a fascinating hobby that turns rough, jagged stones into smooth, polished treasures. By simulating the natural erosion process, you can create beautiful specimens right in your own home.
How a Rock Tumbler Transforms Rough Stones
The process relies on a combination of friction, water, and abrasive grit. Whether you use a rotary or vibratory machine, the action forces the stones to rub against each other constantly.
As the rocks collide, the abrasive grit slowly wears down sharp edges and surface imperfections. This mechanical action is the foundation of all lapidary equipment used for polishing stones.
What You Can Expect From Tumbled Rocks
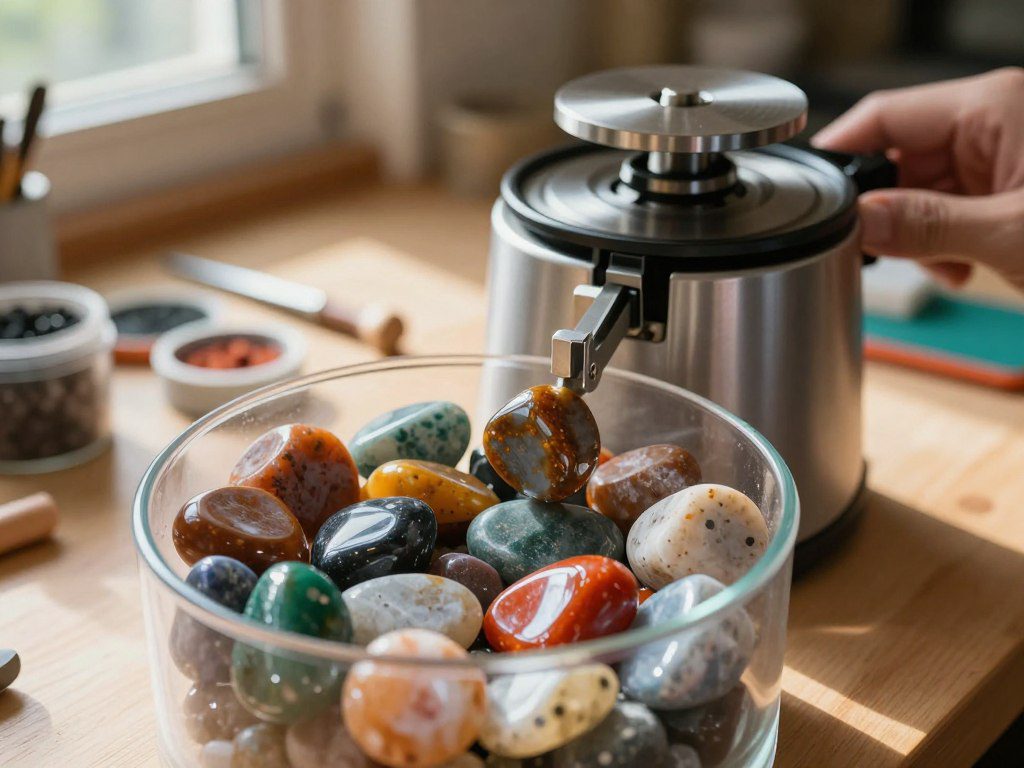
It is important to set realistic goals for your first batch of tumbling stones. The process will round off sharp corners and create a smooth, glossy surface.
However, you should remember that deep fractures or natural mineral patterns will often remain visible. These unique characteristics are what make each piece special and authentic.
Essential Rock Tumbling Supplies for a First Batch
To begin your journey, you will need to gather specific rock tumbling supplies. Many beginners choose to purchase pre-made rock tumbling kits to ensure they have everything required for success.
Barrel, tumbling media, polishing grit, and water
The barrel acts as the chamber where the magic happens. You will need to add water and specific grades of grit to facilitate the smoothing process.
Tumbling media is also vital, as it helps cushion the rocks and carries the grit into every crevice. This combination ensures that your rock tumbling project results in a uniform finish.
Safety glasses, dust protection, and cleanup materials
Safety should always be your top priority when working with abrasive materials. Always wear safety glasses to protect your eyes from accidental splashes of slurry.
Using a dust mask is also recommended when handling dry grit to avoid inhaling fine particles. Finally, keep paper towels and a dedicated bucket nearby to make your rock tumbling cleanup quick and efficient.
Choosing Rocks That Will Tumble Well
Your success in beginner rock tumbling depends heavily on the quality of your raw materials. Picking the right stones ensures that your final product looks professional and polished. Taking the time to evaluate your collection before starting the machine will save you hours of frustration.
Selecting Hard, Durable Stones With Similar Strength
The most important rule is to group stones with similar hardness levels. If you mix soft rocks with hard ones, the softer material will grind away too quickly. This process often creates a thick, muddy slurry that prevents the harder stones from getting a proper shine.
Best Beginner Materials for Tumbling Stones
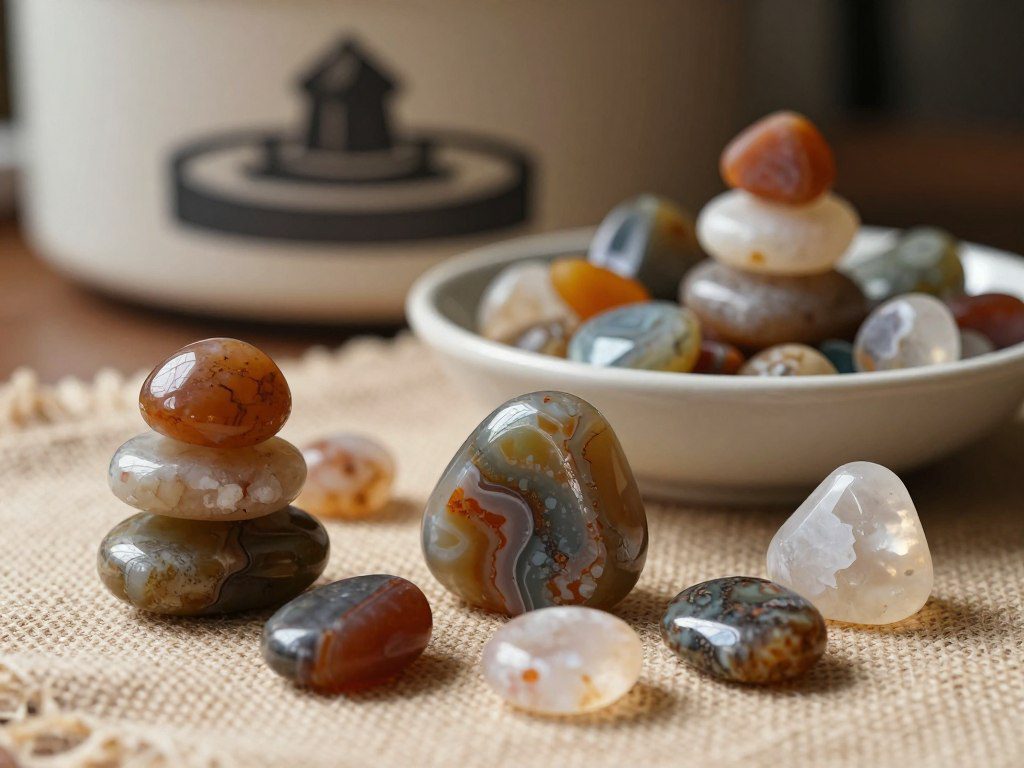
When you are just starting out, it is best to stick with materials that are known to be durable. These stones are forgiving and produce consistent results.




Quartz, jasper, agate, and petrified wood
These materials are excellent choices for tumbling stones because they are hard and dense. Quartz, jasper, agate, and petrified wood all have a similar Mohs hardness, usually around 7. This similarity allows them to wear down at a compatible rate during the grinding stages.
Why mixed hardness can damage a batch
Mixing rocks of vastly different hardness levels often leads to poor results. The softer stones will turn into grit, which can cushion the harder stones and stop the polishing process. Always try to keep your batch composition consistent to ensure your tumbled rocks come out smooth and glossy.
Rocks to Avoid in a Beginner Tumbler
Not every rock you find in your backyard is suitable for a tumbler. Some materials are simply too fragile to survive the long grinding process.
Soft minerals, crumbly stones, and heavily fractured pieces
Avoid rocks that feel chalky or have visible cracks running through them. These stones are likely to break apart during the first stage of tumbling. If a stone is already fractured, it will likely shatter into smaller, jagged pieces that can ruin the rest of your batch.
Potentially hazardous materials and unknown collected rocks
Be cautious with rocks that have metallic lusters or unknown origins, as some minerals can contain toxic elements like lead or arsenic. If you cannot identify a stone, it is safer to leave it out of your tumbler. Stick to known, safe materials to protect your health and your equipment.
Sorting Rocks by Size, Shape, and Surface Condition
Before you load your barrel, sort your stones by size and shape. A good mix of sizes helps the tumbling action, but you should avoid putting tiny pebbles in with large, heavy rocks. Large rocks can crush smaller ones, leading to uneven wear and wasted material.
Finally, inspect the surface of each stone for deep pits or holes. While the tumbler will smooth out rough edges, very deep cavities may never fully polish. Sorting your stones carefully ensures that every piece in your batch has the best chance of becoming a beautiful, finished gem.
Rock Tumbling Equipment and Supplies to Buy
Investing in quality rock tumbling supplies ensures your hobby remains fun and productive. Whether you are a hobbyist or a budding geologist, having the right tools makes the process much smoother. Proper lapidary equipment acts as the foundation for every successful batch you process at home.
Choosing Between Rotary and Vibratory Tumblers
The most significant decision you will face involves selecting the right machine. These two types of tumblers operate differently and produce unique results for your stones.
Why rotary tumblers are usually best for beginners
Most people starting out prefer rotary tumblers because they are simple to operate and very reliable. These machines use a rotating barrel to tumble rocks in a slurry of grit and water. They are perfect for beginner rock tumbling because they handle rough stones effectively and require very little maintenance.
When a vibratory tumbler makes sense
Vibratory tumblers move in a rapid, shaking motion rather than a slow rotation. They are excellent for polishing stones that have already been shaped, as they preserve the original form of the rock better than rotary models. Experienced hobbyists often use them to speed up the final polishing stages.
Understanding Barrel Capacity and Batch Size
Barrel capacity dictates how many stones you can process at once. A larger barrel allows for bigger batches, but it also requires more grit and water to function correctly. Always aim to fill your barrel about two-thirds to three-quarters full for the best results in your diy rock tumbling projects.
Rock Tumbling Kits: What They Include and What They May Lack
Many newcomers choose rock tumbling kits to get everything they need in one box. These bundles are convenient, but you should always inspect the quality of the included components before you start.
Evaluating the tumbler, grit stages, and polishing media
Check if the kit includes a variety of grit stages, ranging from coarse to fine. High-quality kits provide enough polishing media to complete several batches without needing an immediate restock. Ensure the motor is durable enough to run for several days at a time.
Supplies that may need to be purchased separately
Even the best rock tumbling kits often leave out essential items. You might need to buy extra polishing powder, specialized cleaning brushes, or additional grit separately. Planning for these extra rock tumbling supplies early will prevent delays in your workflow.
| Feature | Rotary Tumbler | Vibratory Tumbler |
|---|---|---|
| Best For | Shaping rough rocks | Polishing shaped stones |
| Noise Level | Moderate | High |
| Ease of Use | Very Easy | Moderate |
| Speed | Slow | Fast |


Useful Upgrades for Easier DIY Rock Tumbling
Once you master the basics, you can improve your efficiency with a few smart upgrades. Adding these items to your workspace will make your diy rock tumbling routine much more enjoyable:
- Extra barrels: Useful for running different grit stages simultaneously.
- Ceramic media: Helps cushion rocks and improves the polish quality.
- Replacement gaskets: Essential for preventing leaks during long cycles.
- Noise-reducing mats: Helps dampen the sound of the machine while it runs.
- Fine-mesh screens: Makes rinsing and sorting your stones much faster.
Step 1: Prepare and Load the Rocks
Successful rock tumbling begins long before you plug in the motor. Taking the time to organize your materials ensures that your final results look professional and polished.
Wash and Inspect Every Stone Before Tumbling
Start by scrubbing your rough stones under warm water to remove any dirt, clay, or debris. This cleaning process prevents contaminants from interfering with the abrasive action of your rock tumbling supplies.
Inspect each stone closely for deep cracks or hidden fractures. If a rock looks like it might crumble under pressure, it is best to set it aside.
Remove Sharp Edges and Unstable Pieces
Use a hammer or a pair of pliers to gently remove any thin, fragile points from your stones. These sharp edges often break off during the first few days of diy rock tumbling, which can ruin the consistency of your grit.
Removing these weak spots early helps maintain a stable environment inside the barrel. This simple step leads to much better results for your tumbling stones.
Fill the Barrel to the Correct Level
Fill your barrel about two-thirds to three-quarters full for the best movement. If the barrel is too empty, the rocks will slam against each other rather than rolling smoothly.
Combining large, medium, and small rocks safely
A mix of sizes creates the best grinding action. Large stones provide weight, while smaller pieces fill the gaps to ensure even contact across all surfaces.
Using ceramic media to fill empty space
If you do not have enough stones to reach the fill line, add ceramic media. This material acts as a cushion and helps carry the grit to every surface of your tumbling stones.
Add Water and Choose the First Grit Stage
Water is essential for creating the slurry that carries the abrasive grit. Without enough liquid, the process will stall and potentially damage your equipment.
How much water to use for a rotary barrel
Add just enough water to reach the bottom of the top layer of rocks. You want the stones to be wet, but not completely submerged in a deep pool.
Why coarse silicon carbide grit is the usual starting point
Coarse silicon carbide is the industry standard for the first stage of rock tumbling. Its sharp, aggressive particles quickly grind down rough surfaces to create a uniform shape.
Seal the Barrel and Position the Tumbler
Ensure the lid is clean and free of grit before sealing it tightly. A secure seal prevents leaks and keeps your diy rock tumbling workspace clean.
Place the barrel on the rollers, ensuring it sits level and rotates freely. Proper alignment is vital for a quiet and efficient rock tumbling experience.
Step 2: Run the Coarse Grit Stage
The coarse grit stage serves as the foundation for every successful batch of polished stones. During this phase, the abrasive action of the polishing grit works to grind down sharp edges, remove deep surface irregularities, and smooth out prominent scratches. This is the most aggressive part of the process, as it physically reshapes the stones into a more rounded, uniform appearance.
What the Coarse Stage Is Supposed to Accomplish
The primary goal here is to transform rough, jagged rocks into smooth, rounded shapes. By using a heavy-duty abrasive, you are essentially erasing the natural flaws that would otherwise prevent a high-quality shine later on. Without this step, your final results will lack the professional look that makes beginner rock tumbling so rewarding.
How Long to Run the First Tumbling Cycle
Most batches require a significant amount of time to reach the desired shape. While every rock is different, you should plan for a cycle that lasts at least one week.
Checking progress after about seven days
After the first week, stop the tumbler and perform a quick inspection. You are looking for stones that have lost their sharpest points and feel smoother to the touch. If the rocks still have deep pits or jagged edges, they are not yet ready to move forward.
Knowing when stones need another coarse cycle
If the surface quality is not where it needs to be, simply add more water and fresh grit, then seal the barrel for another week. It is common for harder stones to require multiple cycles in the coarse stage. Patience is your greatest asset during this phase of the process.
“The secret to a perfect polish is not in the final stage, but in the thoroughness of the initial shaping.” — Anonymous Lapidary Expert
Inspecting the Slurry and Rocks Without Creating Dust
Always perform your inspections while the rocks are wet to avoid creating harmful dust. Never dry-tumble or dry-inspect your stones, as this can release fine particles into the air. Simply rinse the rocks in a bucket of water to see their true shape and surface texture clearly.
Cleaning the Barrel Between Checks
Maintaining a clean environment is vital for success in rock tumbling. You must thoroughly wash the barrel and the rocks before adding new grit to ensure no old, spent abrasive remains.
Safe disposal of used grit and slurry
Never pour your used slurry directly down the kitchen sink, as it can harden and clog your pipes. Instead, pour the waste into a disposable container or a designated area in your yard where it can safely settle and dry.
Preventing coarse grit from contaminating later stages
Even a single grain of coarse grit can ruin your final polish. Use the following table to understand the progression of your polishing grit stages and why cleaning is so important.
| Stage | Purpose | Typical Duration |
|---|---|---|
| Coarse | Shaping and smoothing | 7-14 Days |
| Medium | Refining surface | 7 Days |
| Fine | Pre-polishing | 7 Days |
| Polish | Final high-gloss | 7-10 Days |
Step 3: Move Through the Medium and Fine Grit Stages
Once your stones have survived the initial shaping, it is time to refine their surfaces through the medium and fine grit stages. This phase is critical for removing the deep gouges left by the coarse cycle. Proper attention here ensures that your final rock polishing results are smooth and professional.
Rinsing Rocks Thoroughly Before Changing Grit
Before you introduce new polishing grit, you must clean every stone perfectly. Even a single grain of coarse grit trapped in a crevice can ruin the entire next stage. Use a dedicated bucket to rinse your rocks until the water runs completely clear.
Running the Medium-Grit Stage
Smoothing scratches left by coarse grit
The medium stage acts as a bridge between rough shaping and fine smoothing. It works to erase the deep, jagged scratches left behind by the coarse cycle. You will notice the stones starting to feel much smoother to the touch after this stage.
When to repeat the medium stage
If you inspect your stones and still see deep pits or heavy scratches, do not move on yet. It is often wise to run an extra medium cycle to ensure the surface is uniform. Consistency is the key to a high-quality finish in rock tumbling.
“The art of lapidary is not found in the speed of the machine, but in the patience of the artist who knows when a stone is ready for the next step.”
Running the Fine-Grit Stage
Preparing the surface for polishing
Fine grit is the final preparation step before the actual polish. It creates a matte, satin-like finish that is ready to accept a high-gloss shine. This stage is where the true texture of the stone begins to emerge.
Why skipping stages can lead to disappointing results
Many beginners are tempted to skip the fine stage to save time. However, doing so usually results in dull, scratched stones that fail to reflect light. You cannot “polish away” deep scratches that should have been removed by earlier stages.
| Grit Stage | Primary Goal | Surface Texture |
|---|---|---|
| Coarse | Shape and remove bulk | Rough and pitted |
| Medium | Remove coarse scratches | Smooth but matte |
| Fine | Refine for polish | Satin and uniform |
Cleaning Tools, Barrels, and Media Between Stages
Using separate brushes and screens when possible
Cross-contamination is the enemy of a perfect shine. Use separate brushes and plastic screens for each grit level to prevent stray particles from migrating. Labeling your equipment can help you keep everything organized and safe.
Keeping grit out of drains and household plumbing
Never wash your slurry or grit down the kitchen sink. The abrasive material can settle in your pipes and cause expensive plumbing damage over time. Always dispose of your waste water in a designated outdoor area or a trash-safe container.
Step 4: Polish the Stones to a Glossy Shine
You have reached the most rewarding part of the journey: turning dull, smooth stones into sparkling treasures. While earlier stages focused on removing material to shape your rocks, this final phase is all about surface refinement. Proper rock polishing transforms a matte surface into a brilliant, mirror-like finish.
Choose a Polish Designed for Rock Tumbling
Unlike the coarse abrasive used to grind down rough edges, the final polish is a very fine powder. It works by gently buffing the surface of your tumbling stones to create a high-gloss luster.


Aluminum oxide, cerium oxide, and tin oxide
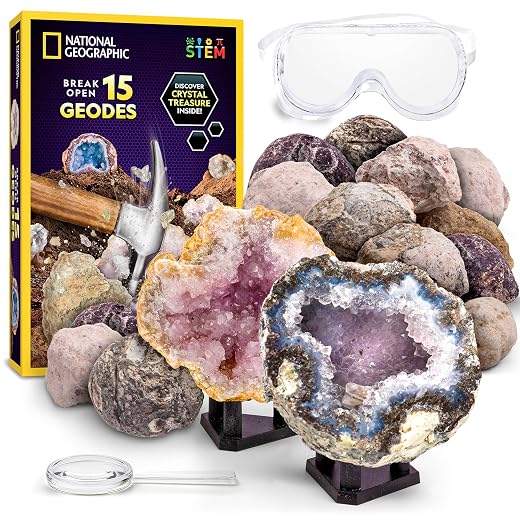
There are three primary compounds used in the hobby. Aluminum oxide is the most common and versatile choice for general use. Cerium oxide is often preferred for quartz-based materials, while tin oxide is a premium choice for achieving an exceptionally bright shine on a variety of minerals.
How polishing powder differs from ordinary abrasive grit
Standard polishing grit is designed to cut away rock, whereas final polish compounds are meant to burnish. These powders are much finer and do not remove significant material. Using them correctly ensures that you do not introduce new scratches to your work.
Load the Barrel for the Polishing Stage
Success in this stage depends on cleanliness and precision. Ensure your lapidary equipment is completely free of any coarse grit residue from previous cycles.
Maintaining the correct rock-to-media ratio
You should maintain a barrel that is about two-thirds to three-quarters full. If you have too much empty space, the rocks will impact each other too hard and cause bruising. Use plastic pellets as filler media to cushion the stones and ensure they move smoothly against the barrel walls.
Adding water without making the slurry too thin
Add just enough water to cover the rocks, but keep the slurry thick. A thin, watery mix will prevent the polish from clinging to the stones. The consistency should resemble a thick paste or heavy cream to ensure even coverage.
Run and Monitor the Polish Cycle
Patience is vital during this final stage. You are no longer grinding, so the process requires a steady, gentle rotation.
Typical polishing times for a rotary tumbler
For most tumbled rocks, a polish cycle lasts between five and seven days. Running the tumbler for too short a time will result in a hazy finish. Conversely, running it for too long can sometimes cause the polish to break down and lose its effectiveness.
Signs that the polish is working
You will notice the slurry becoming very smooth and creamy. When you inspect a stone, it should begin to show a distinct reflection. If the surface looks cloudy or dull, the polish may not be fully active or the barrel may be too clean/dry.
Wash the Finished Tumbled Rocks Without Scratching Them
Once the cycle is complete, remove the stones carefully. Rinse them thoroughly under warm water to remove all traces of the polishing compound. Use a soft cloth to pat them dry, as rubbing them vigorously can sometimes cause fine surface scratches.
Burnishing Stones for a Cleaner, Brighter Finish
Burnishing is an optional final step that removes any remaining film from the rocks. Simply run the stones in the barrel with water and a small amount of mild soap or burnishing compound for about an hour. This extra step ensures your collection looks professional and vibrant.
| Compound | Best For | Finish Quality |
|---|---|---|
| Aluminum Oxide | General Purpose | High Gloss |
| Cerium Oxide | Quartz & Agate | Mirror Finish |
| Tin Oxide | Hard Minerals | Brilliant Shine |
Rock Tumbling Safety, Cleaning, and Maintenance
A successful hobbyist knows that a clean workspace leads to better results and a safer home environment. Whether you are new to the craft or looking to refine your process, prioritizing safety ensures that your diy rock tumbling experience remains enjoyable and productive.
Prevent Silica Dust During Rock Tumbling
Keep rocks and slurry wet during handling
Silica dust is a byproduct of grinding stones and can be harmful if inhaled. Always keep your rocks and the abrasive slurry wet while you are working with them. This simple habit prevents fine particles from becoming airborne.
Use ventilation and appropriate respiratory protection
Work in a well-ventilated area to ensure fresh air circulation. If you are cleaning dry barrels or handling fine powders, wear a high-quality dust mask or respirator. These rock tumbling supplies are essential for protecting your lungs from microscopic dust.
Protect Hands, Eyes, and Skin From Abrasive Slurry
The slurry inside your barrel is highly abrasive and can irritate your skin. Wear rubber gloves when handling wet stones to avoid direct contact with grit. Additionally, keep safety glasses nearby to protect your eyes from accidental splashes during the rinsing process.
Operate the Tumbler Safely at Home
Choosing a stable, ventilated location
Place your machine on a flat, sturdy surface to prevent it from vibrating off the edge. A garage, basement, or utility room with good airflow is the ideal spot for rock tumbling. Avoid placing the unit in small, enclosed closets where heat can build up.
Managing noise, heat, cords, and moving parts
Most tumblers run for days at a time, so keep the power cord away from water sources and high-traffic areas. Monitor the motor for excessive heat and ensure that loose clothing or hair stays clear of moving belts. Using a sound-dampening mat can also help manage the noise levels in your home.
Clean and Maintain the Tumbler After Each Batch
Inspecting barrels, lids, gaskets, and drive belts
Regular maintenance extends the life of your equipment. After every cycle, check the barrel for cracks and ensure the lid gasket is clean and free of debris. A worn drive belt should be replaced immediately to keep the barrel rotating smoothly.
Preventing odors, leaks, and cross-contamination
Thoroughly wash all components to prevent the buildup of old grit, which can cause odors or ruin future batches. Proper cleaning prevents cross-contamination between different grit stages. Use the following table to keep your maintenance routine on track.
| Task | Frequency | Importance |
|---|---|---|
| Check Barrel Seal | Every Batch | High (Prevents Leaks) |
| Inspect Drive Belt | Monthly | Medium (Prevents Stalls) |
| Clean Exterior | Weekly | Low (Keeps Area Tidy) |
| Replace Gasket | As Needed | High (Ensures Vacuum) |
Troubleshooting Common Beginner Rock Tumbling Problems
If your latest batch of stones didn’t turn out as expected, don’t worry, as most issues are easy to fix. Learning to identify what went wrong is a key part of the hobby. By observing your tumbled rocks closely, you can adjust your technique for much better results next time.
Why the Rocks Still Look Dull After Polishing
A lack of shine is the most common frustration for beginners. If your stones appear matte or cloudy, the issue usually stems from the final stages of the process.
Insufficient fine grit or polish time
Sometimes, the stones simply need more time to reach their full potential. If you cut the cycle short, the polishing grit cannot complete the micro-abrasion needed for a mirror finish. Always ensure you run the final stage for the full recommended duration.
Surface damage, unsuitable rock, or contamination
If the surface of the stone has deep scratches, the polish cannot fill them. Additionally, if you mix different types of rocks with varying hardness, the softer stones may get scratched by the harder ones. Always check for cross-contamination from previous grit stages, as even a tiny grain of coarse grit can ruin your final shine.
What to Do When Rocks Have Chips or Cracks
Chips often occur when the barrel is under-filled or when the rocks are too large for the container. To prevent this, ensure your barrel is filled to the correct level with a mix of stone sizes. If a rock has deep cracks, it may be best to remove it early, as these areas can trap grit and cause issues later.
Fixing a Thin, Dry, or Overly Thick Slurry
The consistency of your slurry is vital for effective rock polishing. Use this guide to maintain the right balance:
- Thin slurry: Add more rock or reduce the water level.
- Dry load: Add a small amount of water to keep the mixture moving.
- Thick slurry: Add a little water to improve the flow and prevent the barrel from stalling.
Preventing Rocks From Sticking Together
Rocks often stick together if the slurry becomes too thick or if you are using too much filler. Ensure you have a good variety of sizes in your barrel to keep the stones moving independently. If they continue to clump, try adding a small amount of plastic pellets to act as a cushion.
Diagnosing Excessive Noise, Leaks, or Barrel Slippage
If your tumbler sounds louder than usual, check the belt tension or the barrel seals. Leaks are often caused by debris on the rim of the barrel, so keep it clean. If the barrel is slipping, ensure the rollers are dry and free of oil or grit.
How to Improve Results and Build a Reliable Tumbling Routine
Consistency is the secret ingredient that separates casual hobbyists from those who achieve professional-looking results. By refining your process, you can ensure that your lapidary equipment performs at its peak every single time you start a new cycle.
Keep a Batch Log for Grit, Dates, and Results
Maintaining a detailed logbook is a game-changer for beginner rock tumbling enthusiasts. Record the specific grit sizes used, the start and end dates for each stage, and the final outcome of your stones.
This data allows you to identify which variables lead to the best shine. Over time, you will notice patterns that make your future projects much more predictable and successful.
Use Consistent Batch Composition From Stage to Stage
The volume of material inside your barrel significantly impacts the friction and grinding action. Keeping your load levels consistent ensures that the rocks move correctly throughout the entire process.
Replacing lost material with ceramic tumbling media
As rocks wear down, the total volume in the barrel decreases. You should add ceramic tumbling media to fill the void and maintain the ideal barrel capacity for effective grinding.
Separating stones by type when their hardness differs
Mixing stones with vastly different hardness levels often leads to poor results. Always group your rocks by their Mohs hardness to prevent softer stones from being crushed by harder ones during the cycle.
Judge Progress by Surface Quality Rather Than Calendar Days
Many beginners rely strictly on a calendar, but rock tumbling is not an exact science based on time alone. Instead, you must inspect your stones after each stage to ensure they are ready for the next step.
Look for a smooth, matte finish before moving from coarse to medium grit. If the surface still shows deep pits or scratches, keep the stones in the current stage for a few more days.
Experiment With Different Rocks After Mastering the Basics
Once you feel comfortable with your rock tumbling kits, you can start branching out into more complex materials. Mastering the fundamentals gives you the confidence to handle a wider variety of specimens.
Testing local finds before adding valuable specimens
Before you commit expensive or rare stones to the tumbler, test your process with local rocks. This practice helps you understand how specific materials react to your equipment without risking your best pieces.
Creating repeatable batches with agate, jasper, and quartz
Focus on building reliable recipes for common stones like agate, jasper, and quartz. These materials are excellent for perfecting your technique because they are durable and respond well to standard polishing methods.
| Strategy | Benefit | Difficulty |
|---|---|---|
| Batch Logging | Predictable results | Low |
| Ceramic Media | Maintains volume | Low |
| Hardness Sorting | Prevents damage | Medium |
| Surface Inspection | Higher quality | High |
Turning Finished Tumbled Rocks Into Useful Projects
Transforming your raw finds into beautiful treasures is the most rewarding part of the hobby. After completing your diy rock tumbling process, you will have a collection of smooth, vibrant stones ready for display or creative use.
Sorting and Grading Finished Stones
Before starting any project, organize your tumbled rocks by size, shape, and color. Grouping them by pattern or mineral type helps you visualize how they will look in a finished piece.
You should also grade them based on their surface quality and degree of shine. High-quality stones with a mirror-like finish are perfect for jewelry, while those with minor imperfections work well for decorative mosaics.
Displaying Tumbled Rocks at Home
Showcasing your rock polishing efforts is a great way to enjoy your collection daily. Clear glass jars or decorative bowls allow light to catch the surface of the stones, highlighting their natural beauty.
Consider arranging them in shadow boxes or on floating shelves. You can even use them as unique vase fillers to add a touch of nature to your living space.
Using Polished Stones in Jewelry and Crafts
Many enthusiasts enjoy turning their tumbling stones into wearable art. The process is simple and requires only a few basic tools to get started.
Simple wire wrapping and pendant ideas
Wire wrapping is an excellent entry-level technique for beginners. By using copper or silver wire, you can secure a stone to create a custom pendant without needing to drill holes.
Decorative jars, mosaics, and garden features
If you have a large volume of stones, consider creating a mosaic on a stepping stone or a picture frame. You can also place them in garden beds to add a pop of color that will not fade over time.
Storing Tumbled Rocks Without Losing Their Shine
Proper storage is essential to keep your stones looking their best. Avoid storing them in direct sunlight for long periods, as some minerals may fade.
Use soft, fabric-lined containers to prevent scratching. Keeping them in a cool, dry place ensures that your hard work remains protected for years to come.
When to Start a More Advanced Lapidary Project
Once you feel confident with basic tumbling, you might be ready to explore more advanced lapidary work. This could include learning how to cabochon, which involves shaping stones into smooth, domed forms.
| Project Type | Skill Level | Best Stone Type |
|---|---|---|
| Wire Wrapping | Beginner | Hard, uniform stones |
| Mosaic Art | Intermediate | Mixed sizes/shapes |
| Cabochon Cutting | Advanced | Agates and Jaspers |
Moving into advanced projects allows you to take full control over the final shape of your stones. Whether you stick to simple displays or move into complex jewelry making, your journey with diy rock tumbling is just beginning.
Conclusion
Transforming rough stones into brilliant gems is a rewarding journey that blends science with creative expression. Success in beginner rock tumbling relies on your ability to select durable materials and maintain clean equipment throughout every abrasive stage.
Quality tumbled rocks emerge when you commit to patience and careful observation. Keep a detailed log of your progress to track which grit cycles produce the best results for your specific stones. This habit helps you refine your technique and ensures consistent outcomes with every new batch.
Safety remains a top priority as you work with water and abrasive powders. Always handle your materials with care to protect your workspace and your health. Proper wet handling prevents dust and keeps your environment clean while you focus on the transformation process.
You now possess the foundational knowledge to explore the world of lapidary arts. Start by mastering the basics with reliable equipment from brands like Lortone or Thumler’s. As your skills grow, feel free to experiment with unique mineral varieties and advanced finishing techniques. Your next batch of rock tumbling projects awaits your creative touch.
FAQ
What exactly is rock tumbling, and how does it work?
Is it better to buy a rock tumbling kit or individual lapidary equipment?
Which stones are the best for a first-time tumbler?
What are the essential rock tumbling supplies I need for my first batch?
How long does the diy rock tumbling process usually take?
Why do my tumbled rocks look dull after the final polishing stage?
How do I safely handle the slurry and grit during cleanup?
Can I use my finished tumbled rocks for jewelry and crafts?
What is the benefit of using ceramic media or plastic pellets?
How do I maintain my tumbler to ensure it lasts for years?
Before choosing your next batch, consult our rock hardness and pairing guide. If polished stones still look dull, use the surface-diagnosis guide for tumbled rocks to decide which stage needs attention.


 Love Rock Tumbling?
Have a question? Use the form above to submit your question or comment.
I love hearing from you and seeing what you made!