

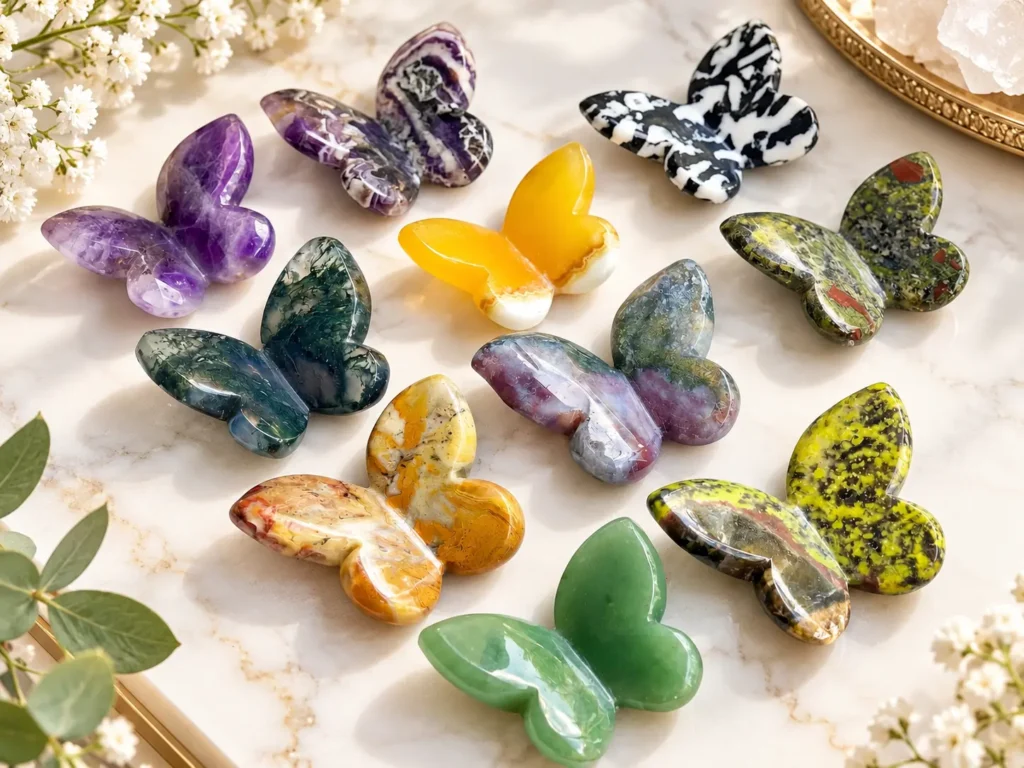
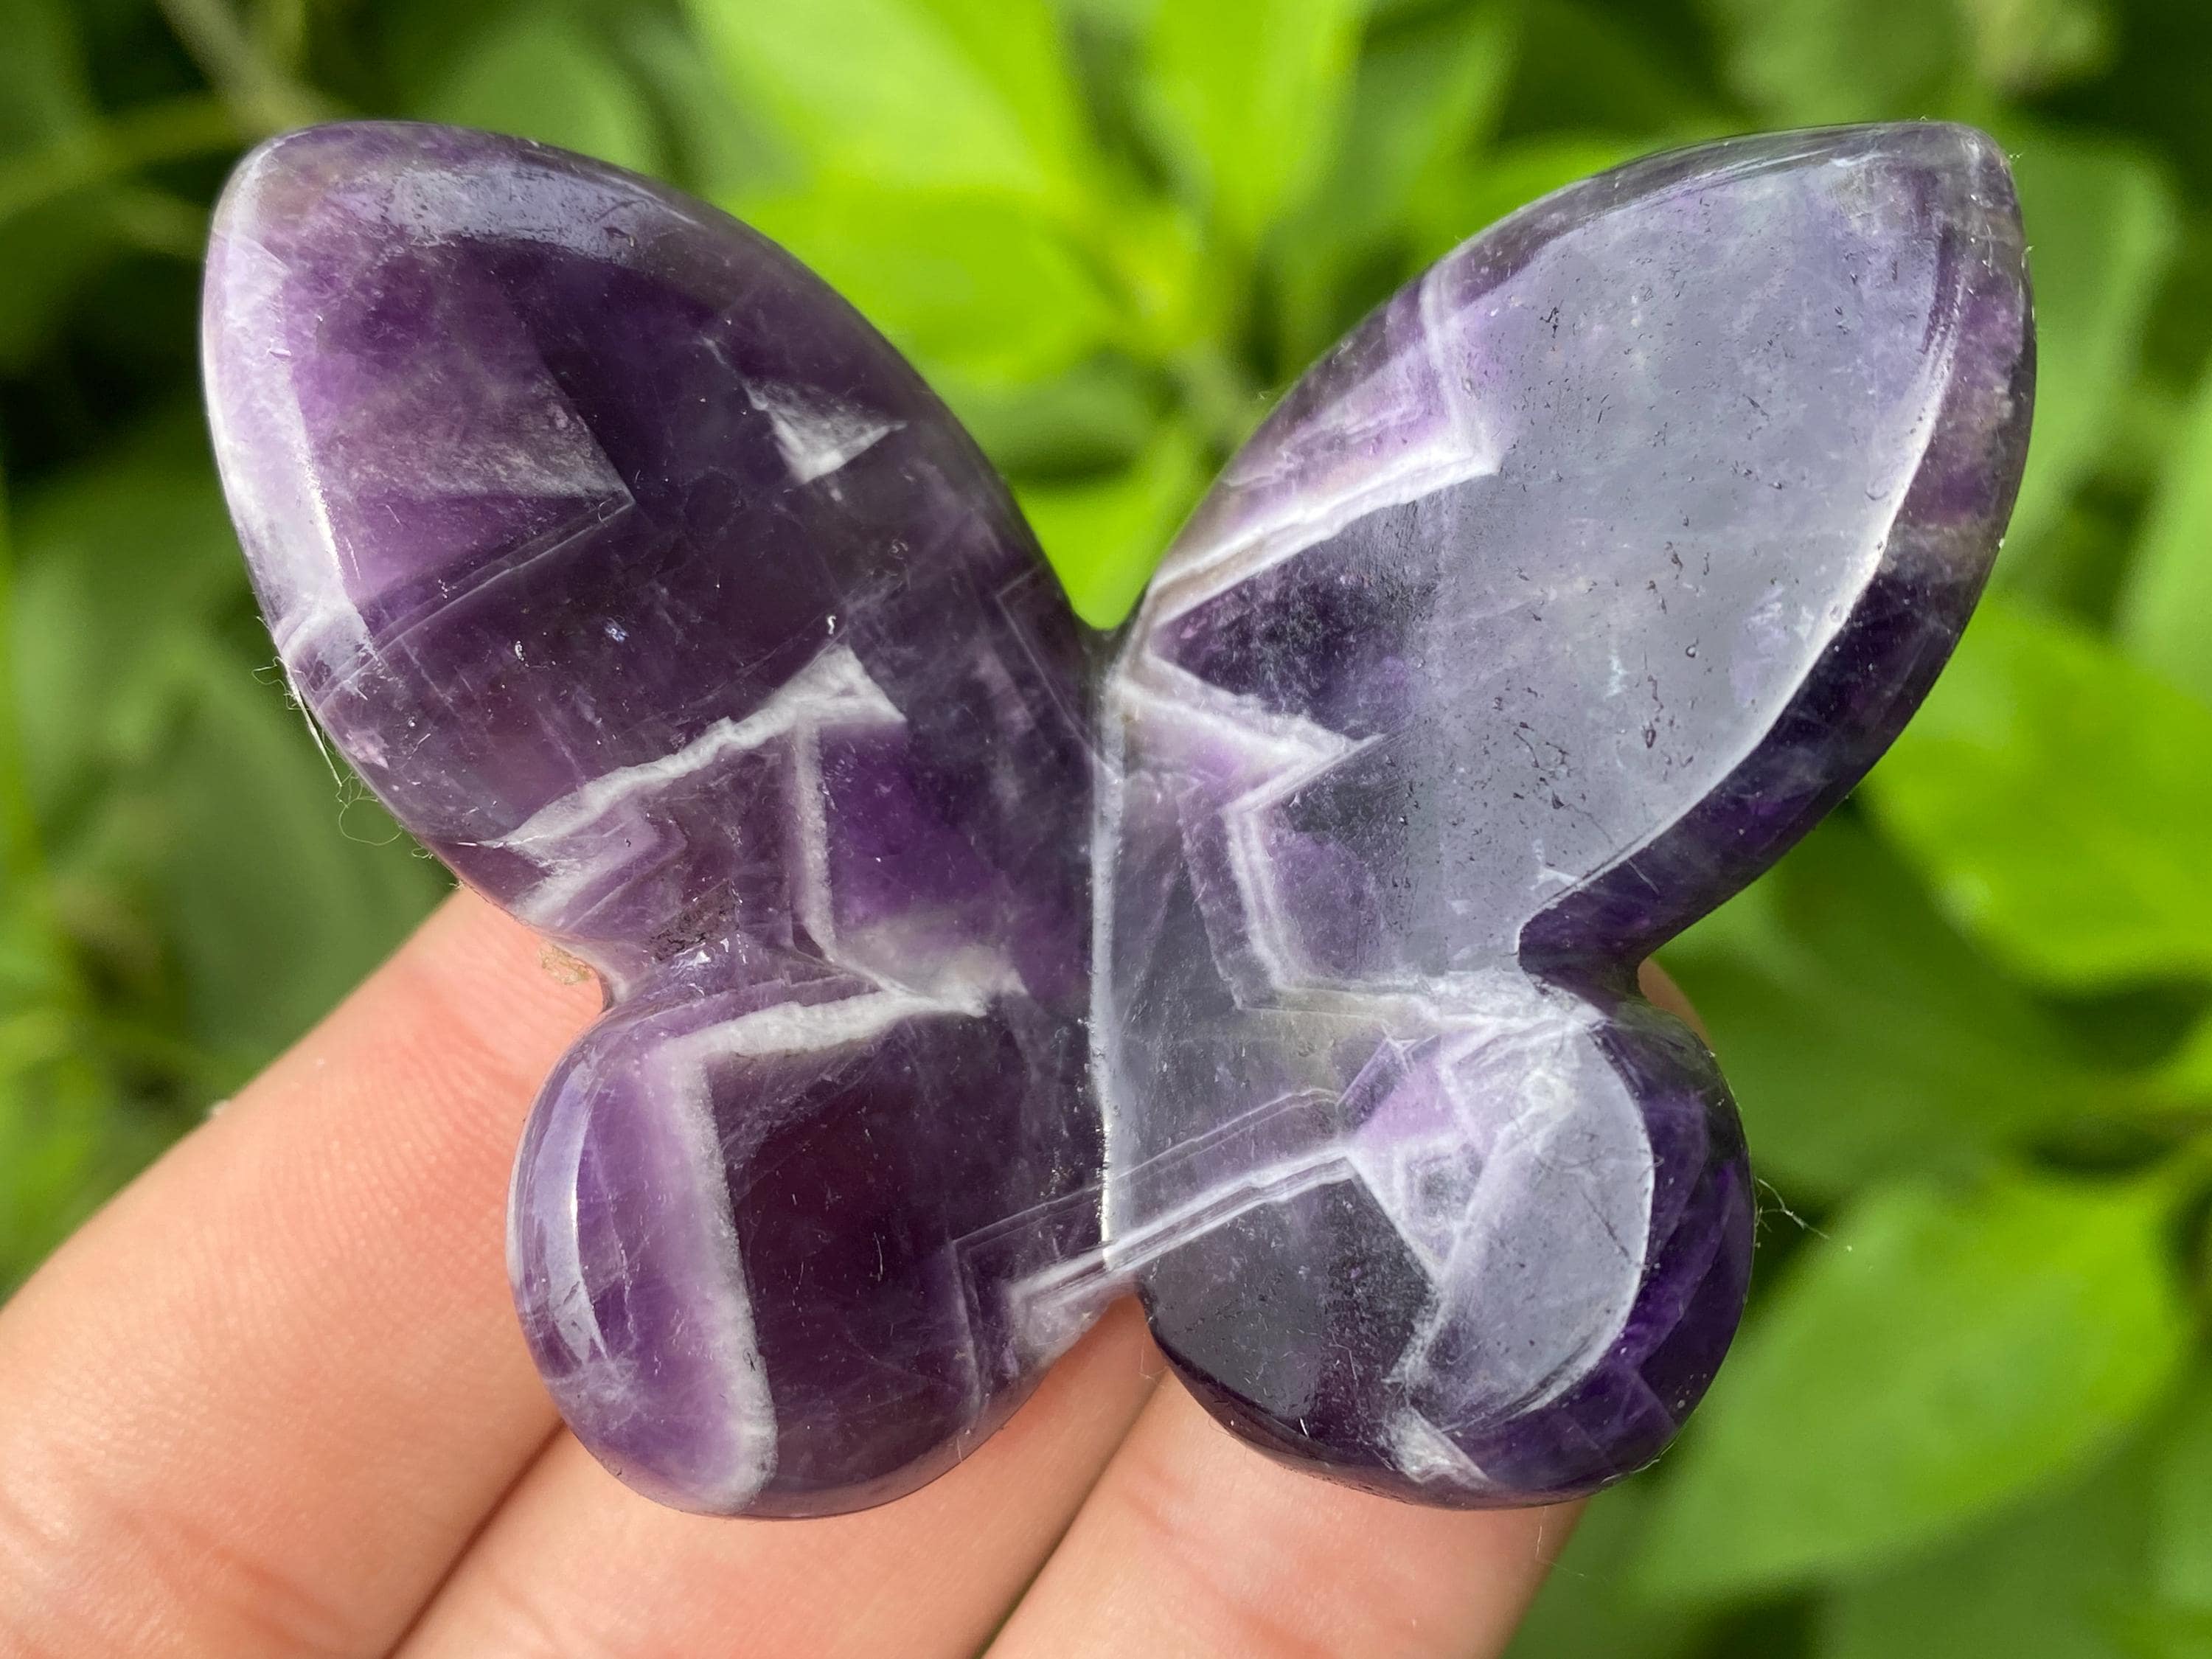
A crystal butterfly carving gets its character from four simple shapes: two long upper wings, two rounded lower wings, and a narrow center that holds everything together. The glossy examples in the reference collection also have gently curved faces, making their wings appear slightly folded instead of completely flat.
This tutorial explains how to recreate that design in natural stone, from choosing a patterned slab to polishing the curves. You carve an existing mineral or rock; you do not create the gemstone itself. Matching the outline is achievable, but reproducing another stone’s exact bands, inclusions, and colors is not.
The inspiration is this LuminaCrystalsGoods butterfly listing. Its stated measurements are 2 inches wide, 0.8 inches high, and 2 inches deep. Treat those as seller specifications, not a measured cutting plan. The method below is a proposed reconstruction of the visible design, not the seller’s disclosed process or a documented workshop test.
Difficulty: Intermediate lapidary work. Allow several sessions for shaping and finishing, plus a practice offcut. Beginners should learn the saw and grinding operations at a lapidary club before attempting the butterfly’s narrow center.
Choose stone for your crystal butterfly carving
Start with verified carving rough from a supplier who can identify the material and disclose dyes, coatings, or stabilization. A polished photograph cannot establish mineral identity, and commercial names do not always describe a single mineral. Ask about the rough’s suitability for thin carved shapes before buying it.
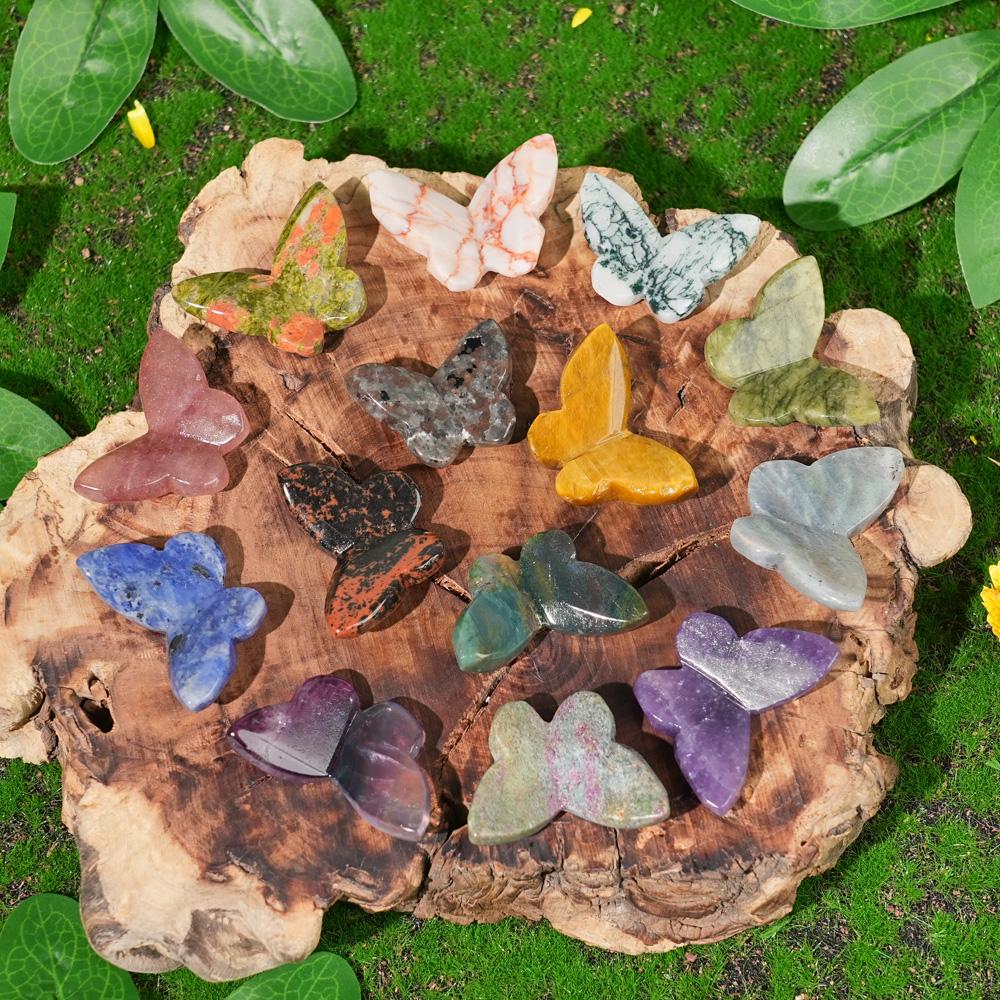
The listing offers these 15 material options. The notes below help you choose the appearance to aim for; each blank will distribute its color differently.
| Material option | What to look for in your rough |
|---|---|
| Crazy agate | Curving cream, yellow, gray, or reddish bands that remain interesting across all four wings. |
| Dream amethyst | Purple and pale quartz banding; place a strong band across the wider upper wings. |
| Dragon’s Blood Stone | Green material with contrasting red patches; confirm the composition behind the trade name. |
| Ocean jasper | Mottled or patterned material with colors you want to retain after shaping; inspect cavities carefully. |
| Moss agate | Green, moss-like inclusions in lighter chalcedony; avoid open fractures through the central connection. |
| Yellow calcite | Yellow material with cream or white zoning; retain generous thickness around the wing roots. |
| Zebra jasper | Bold black-and-white patterning; verify the supplied material rather than relying on its name. |
| Sodalite | Deep blue areas with contrasting pale veins; keep a sound blue area around the center. |
| Pink opal | Pink and cream material with a sound, stable surface; ask about treatments and existing cracking. |
| Blue aventurine | Blue quartz-rich rough with the desired mottling; confirm whether the color is natural or treated. |
| Green aventurine | Green rough with subtle variation; a relatively even color emphasizes the rounded wing profile. |
| Rose quartz | Pale pink, translucent material without a fracture crossing the narrow waist. |
| Amazonite | Blue-green feldspar, sometimes with pale matrix; obtain advice on cleavage orientation before cutting. |
| Small lepidolite | Fine-grained lilac material sold for carving; avoid loose, flaky mica-rich pieces. |
| Fluorite | Green and purple zoning; orient bands deliberately, while prioritizing sound stone over color placement. |
For a first attempt, practice the shape on a sound agate offcut before committing to your chosen specimen. Softness does not automatically make a material easier. The Handbook of Mineralogy records perfect cleavage in both fluorite and calcite: each can split along particular crystal planes despite being relatively easy to scratch.
Lepidolite needs another adjustment. Its mica structure and perfect cleavage mean a flaky piece can shed material during shaping. Dense lapidary-grade aggregates behave differently from individual mica crystals. If an offcut sheds flakes or develops pits, choose better rough or have an experienced carver handle that variation.




Plan the silhouette and prepare your tools
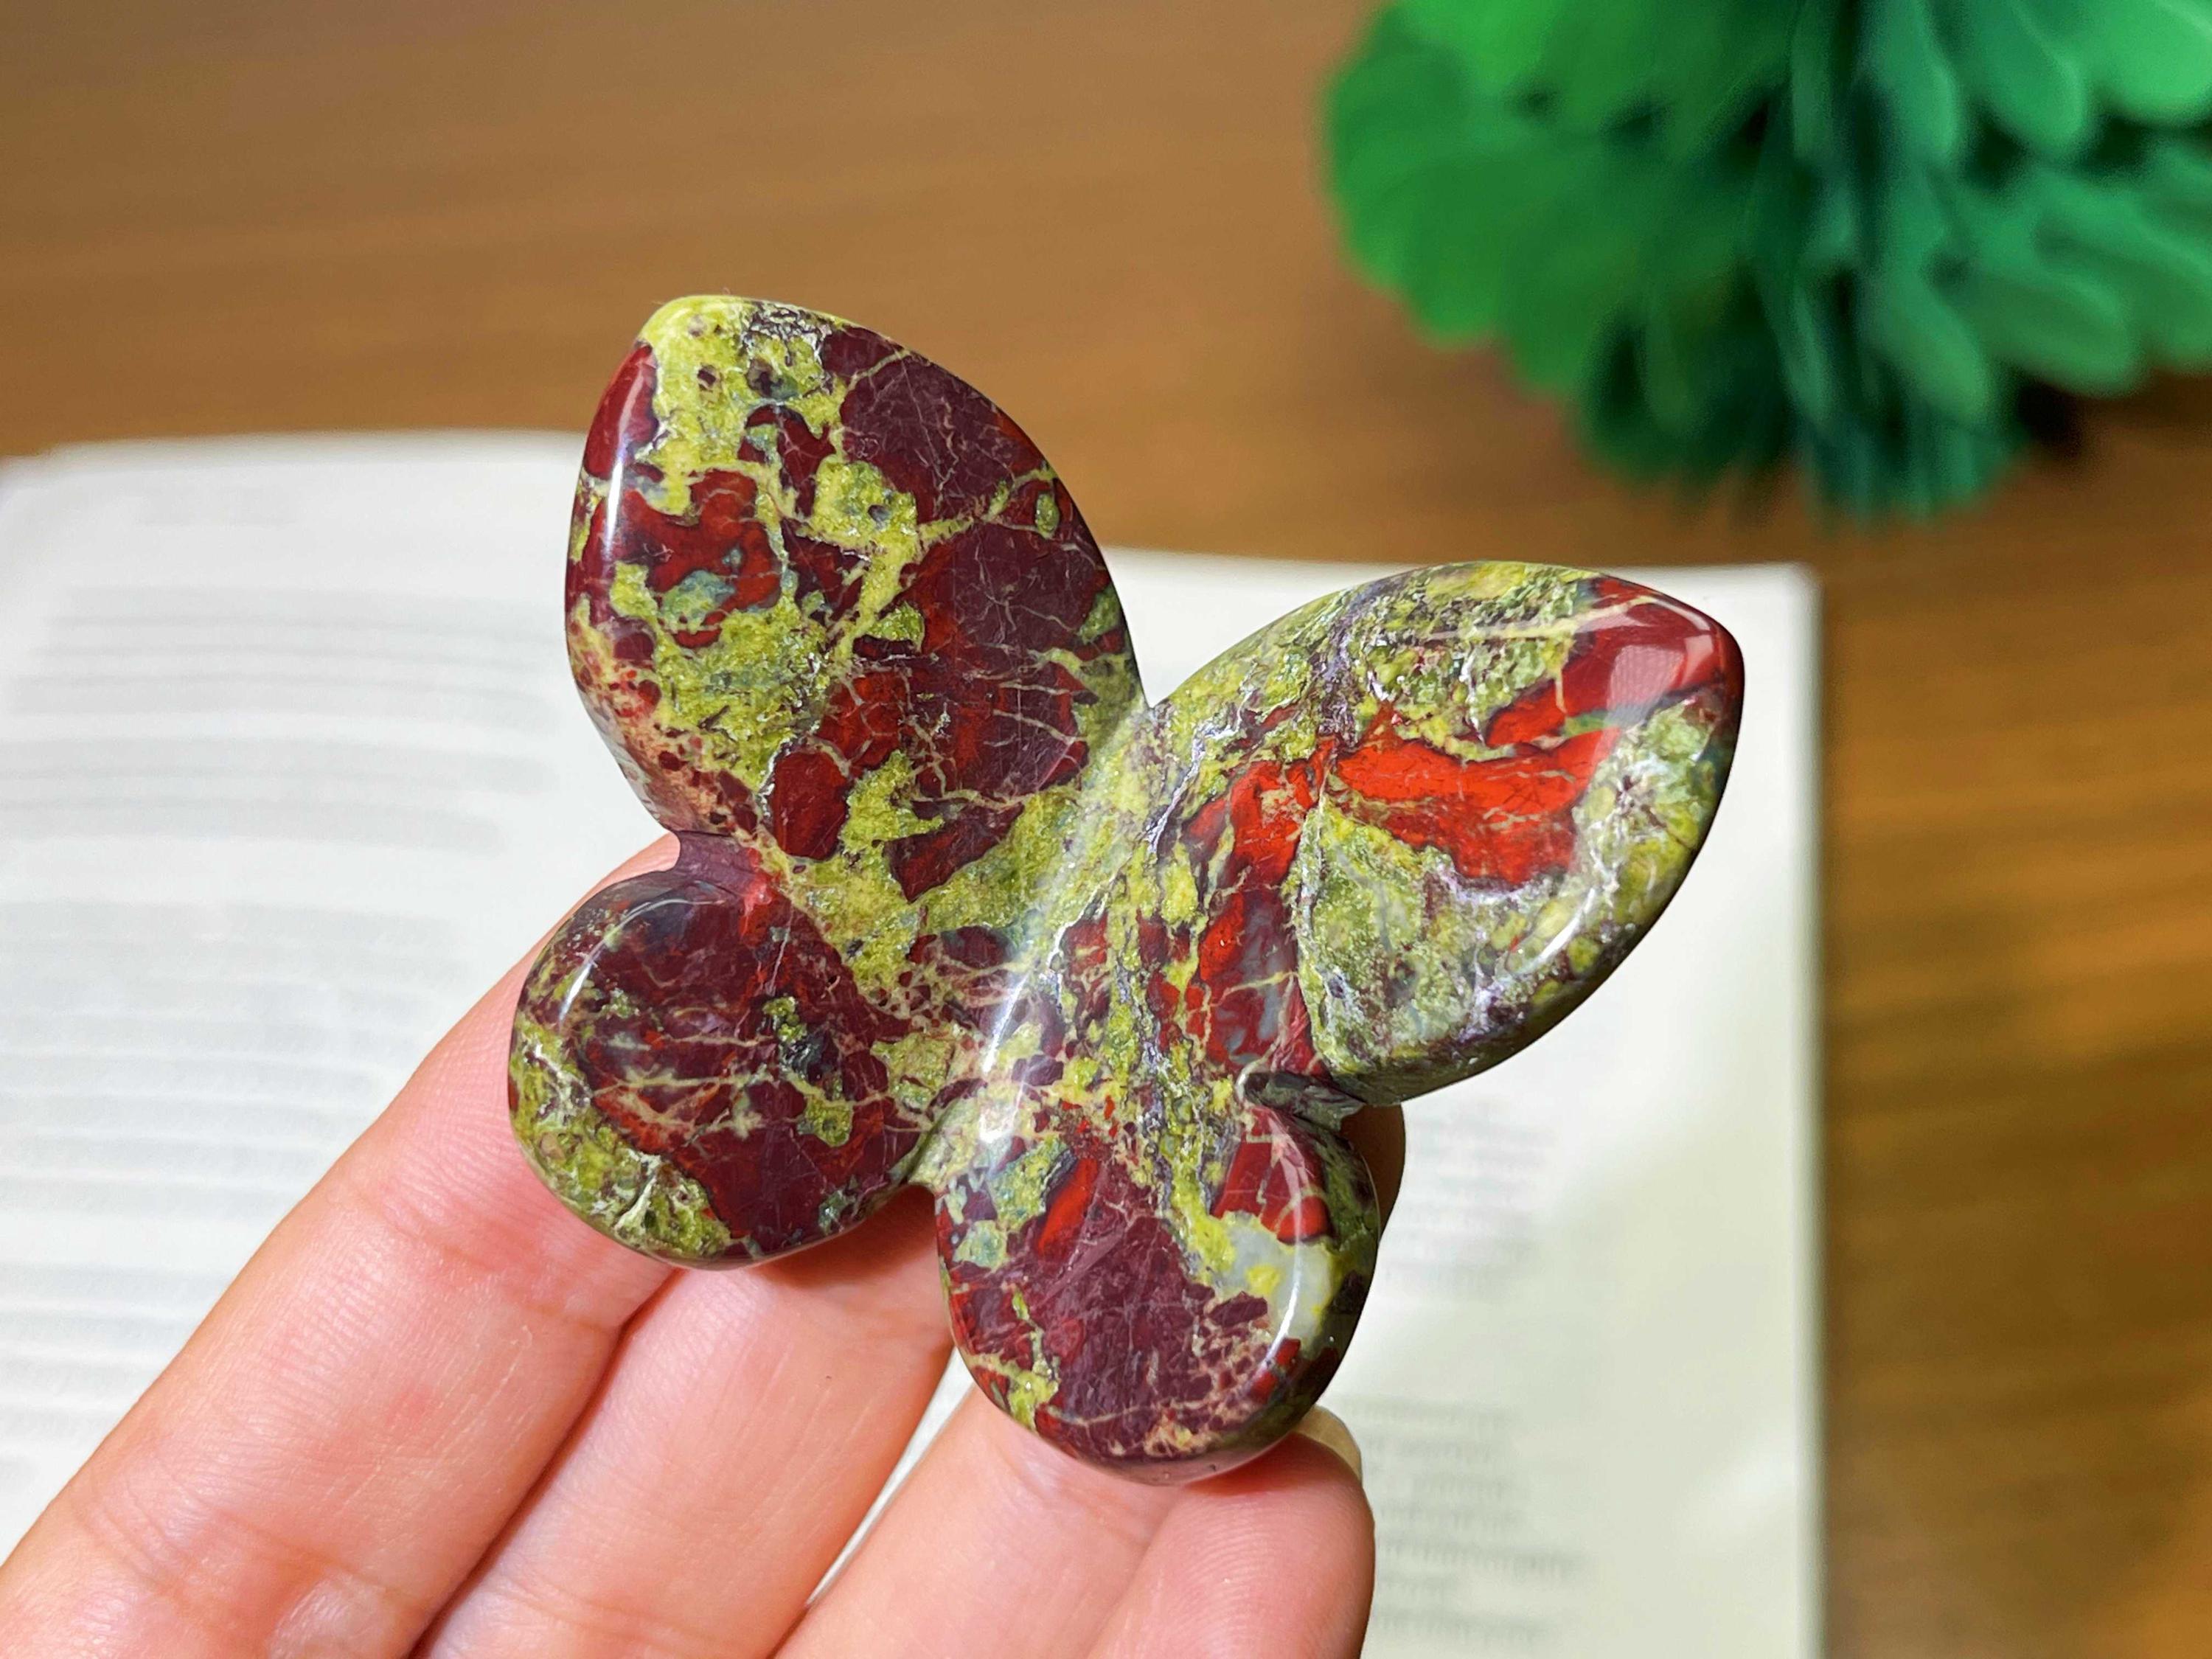
Choose one straight-on reference view and keep it beside the bench. The distinctive shape has large upper wings with softly pointed tips, smaller rounded lower wings, inward curves between the pairs, and shallow notches above and below the center. There are no separate antennae, legs, beads, or metal fittings to add.
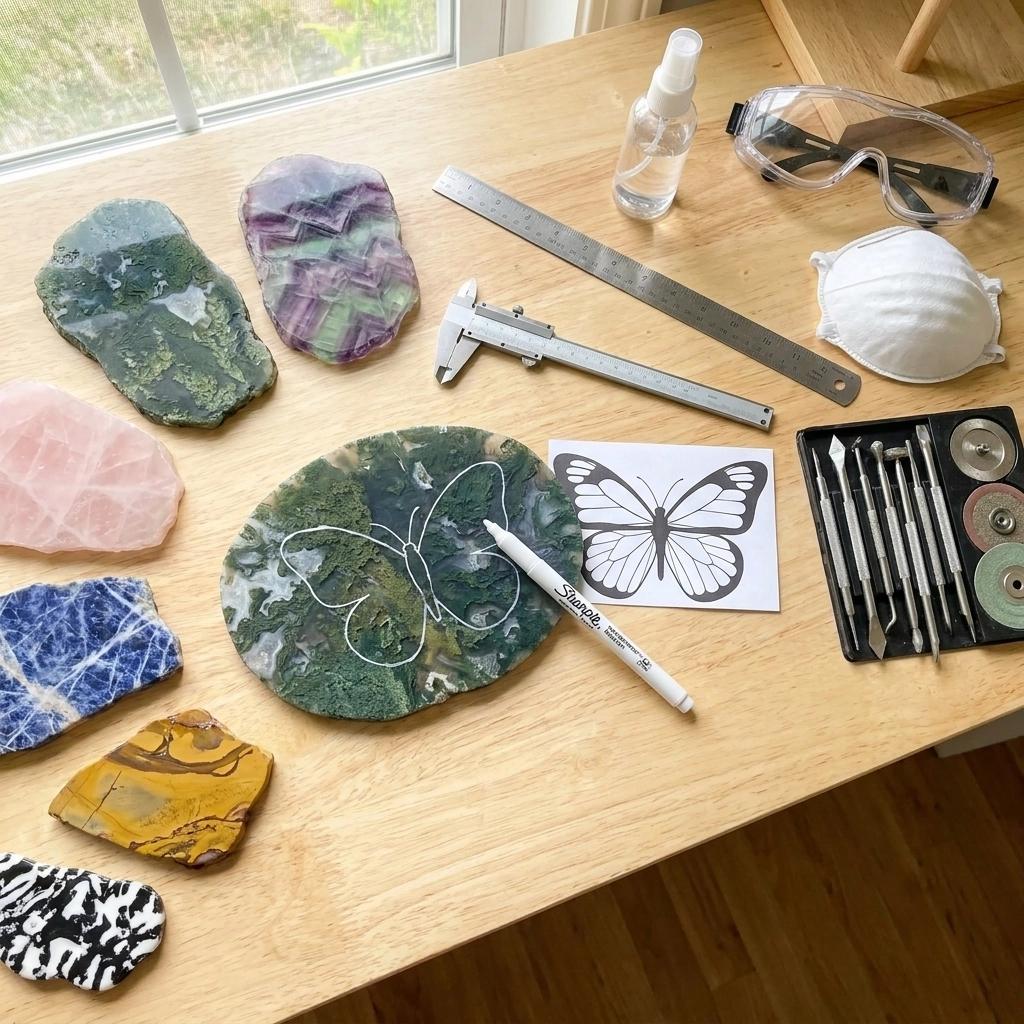
For a roughly 50 mm-wide butterfly, sketch inside a 50 × 50 mm square. Fold the paper vertically, draw one half, and cut through both layers to produce a balanced starting template. Adjust the wings after opening it; this is a suggested drafting method, not an exact tracing of the seller’s carving.
Keep the upper wings noticeably longer than the lower lobes. Round every inward corner, particularly the junctions beside the center. A sharp V-shaped cut creates a vulnerable point where a small chip can become a larger break. Leave the middle as a substantial connection rather than a thin insect-like body.
A blank approximately 60 × 60 × 22–25 mm gives a possible starting allowance for the seller’s overall size, provided it contains sound material throughout the outline. Thickness should suit the intended curve, the actual stone, and your equipment. Have the supplier prepare the slab if your saw cannot accommodate it safely.
Wet the broad face to preview its pattern, then inspect it dry under angled light. Move a paper window over the slab to compare possible placements. Reject an orientation that puts a fracture across the center, even if its colors look perfect. Transfer the outline onto both faces, mirrored on the reverse, and mark the slab’s edge midpoint.
Crystal butterfly carving tools and safety
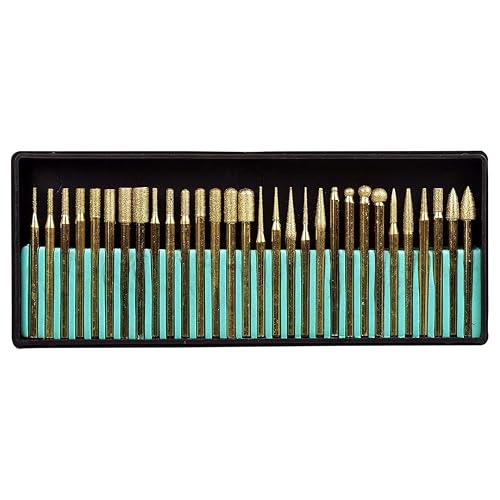
Gather a suitable lapidary saw, wet diamond grinding equipment, and a carving handpiece approved for the intended wet setup. You will also need rounded diamond burs, small sanding points, diamond hand files, compatible polishing supplies, a marking pencil, calipers, magnification, splash containment, and a secure work support.
Match the tool shape to the curve: a broad abrasive for the wing faces, a rounded point for the side recesses, and a small rounded cylinder or ball for the central transition. Diamond Pacific’s round-bur instructions require water. That requirement does not make an ordinary electric rotary tool waterproof; the complete arrangement must be suitable for wet work.
Quartz-rich stone can release hazardous respirable silica when cut or ground. Use effective water delivery at the contact point, appropriate extraction, eye protection, and any respiratory protection required by the workshop’s exposure assessment. Follow the machine’s guarding, electrical protection, speed, and hand-position instructions. OSHA’s silica guidance explains why controlling airborne dust matters.
Keep hair and loose clothing away from moving parts. Collect slurry before it dries, clean with wet methods or suitable HEPA equipment, and follow local disposal requirements. Do not dry sweep stone dust. If the rough’s composition or treatment remains unknown, identify it before machining it.


Cut and shape the four wings
Practice the difficult features first. On an offcut of the chosen material, make one rounded recess, one domed edge, and a small polished patch. Check for chipping, flaking, uneven wear, and heat. This small trial tells you more than assuming every stone in the collection accepts the same pressure and abrasive sequence.
Trim the outline and open the recesses
Use straight, controlled saw cuts around the outer silhouette, leaving approximately 2 mm outside the marked line as a suggested grinding allowance. Preserve extra material around the center and the inward wing junctions. A circular trim-saw blade cannot follow a tight internal curve; never twist the slab against it or use its side for grinding.
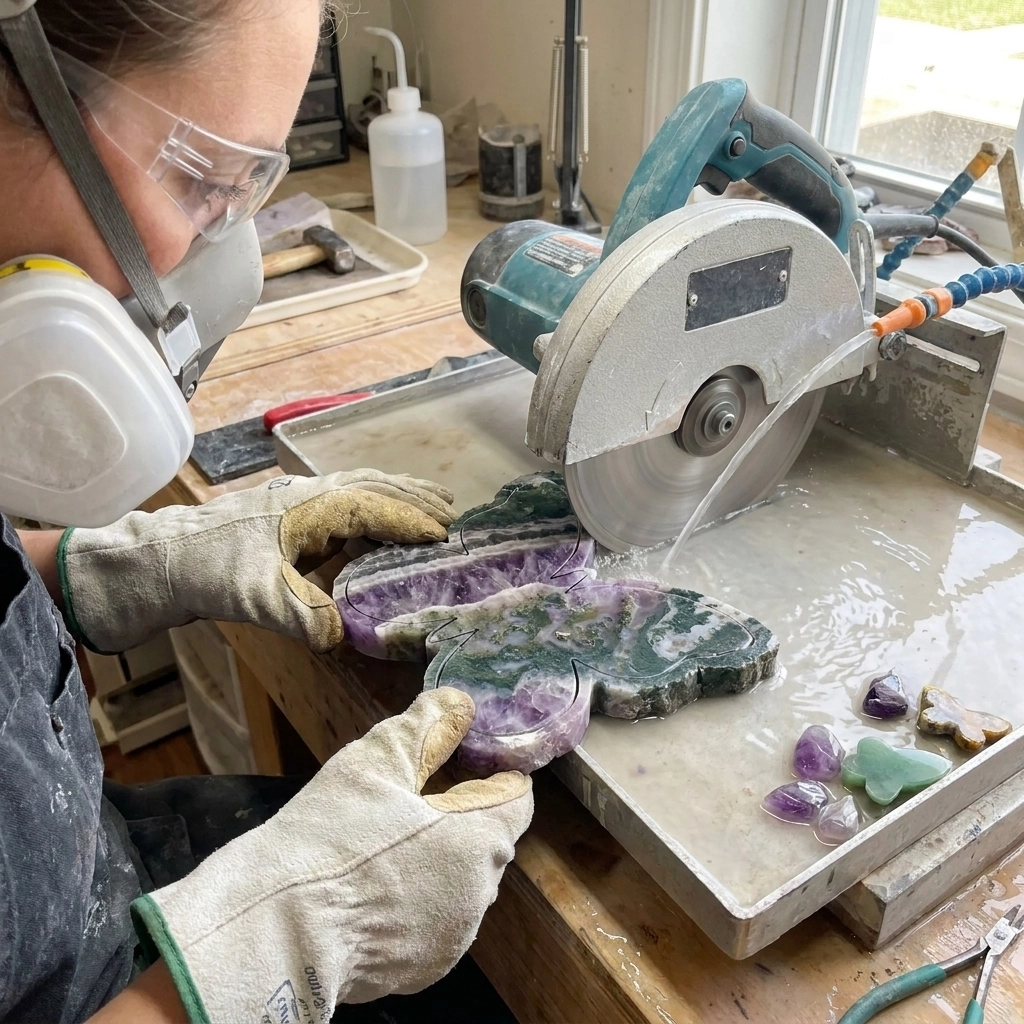
Remove the remaining outside waste gradually with wet diamond grinding. Alternate between matching left and right areas rather than finishing one wing completely first. Recheck the reverse outline so the edge stays aligned through the thickness. Maintain a broad perimeter at this stage instead of sharpening the tips immediately.
Open the side recesses with a rounded bur that fits comfortably into the intended curve. Work in shallow passes, supporting the nearby thick area. Approach from both faces as appropriate so the opening does not become an undercut on one side. Leave the wing roots broad and soften the inside corners.
Next, form the shallow notch between the upper wings and the smaller notch between the lower wings. Stop often and compare the remaining central connection with the template. Do not cut these notches toward each other until only a fragile bridge remains. A sturdy, slightly broader center is preferable to an exact outline that the stone cannot support.
Give the wings their softly folded profile
The reference butterflies look dimensional because their wing surfaces change angle and catch light differently. Create that effect by shaping the thickness already present in the slab. Stone cannot be bent into folded wings, and cutting separate wings for gluing would introduce joints absent from this design.
Mark a narrow central strip on the front. Lower it gradually into a smooth, shallow transition, keeping generous stone beneath it. Then blend each wing into a softly convex surface that rises away from the center before rounding toward its outer edge. Use a broad working area to avoid digging isolated hollows.
Check the carving from its top, bottom, and side after every few passes. Compare corresponding wings with calipers and a simple card profile, looking for similar curves rather than forcing every point to the same thickness. A small difference in the natural pattern can make matching surfaces appear uneven, so inspect the silhouette against plain paper too.
Round the upper tips and lower lobes last. Preserve a continuous, comfortably rounded edge around the entire butterfly. Smooth the back and establish a stable resting area without hollowing directly behind the front’s center groove. No universal minimum thickness guarantees strength; cracks, cleavage, and grain boundaries determine how far you can safely refine it.
The finished-style references keep the wing surfaces simple. Skip engraved veins, eyes, drilled holes, and extra decoration unless you intentionally want a different design. Clean the shaped piece and inspect it dry before sanding. If the center is already flexing, cracking, or shedding grains, stop rather than trying to polish the problem away.
Sand and polish without flattening the shape
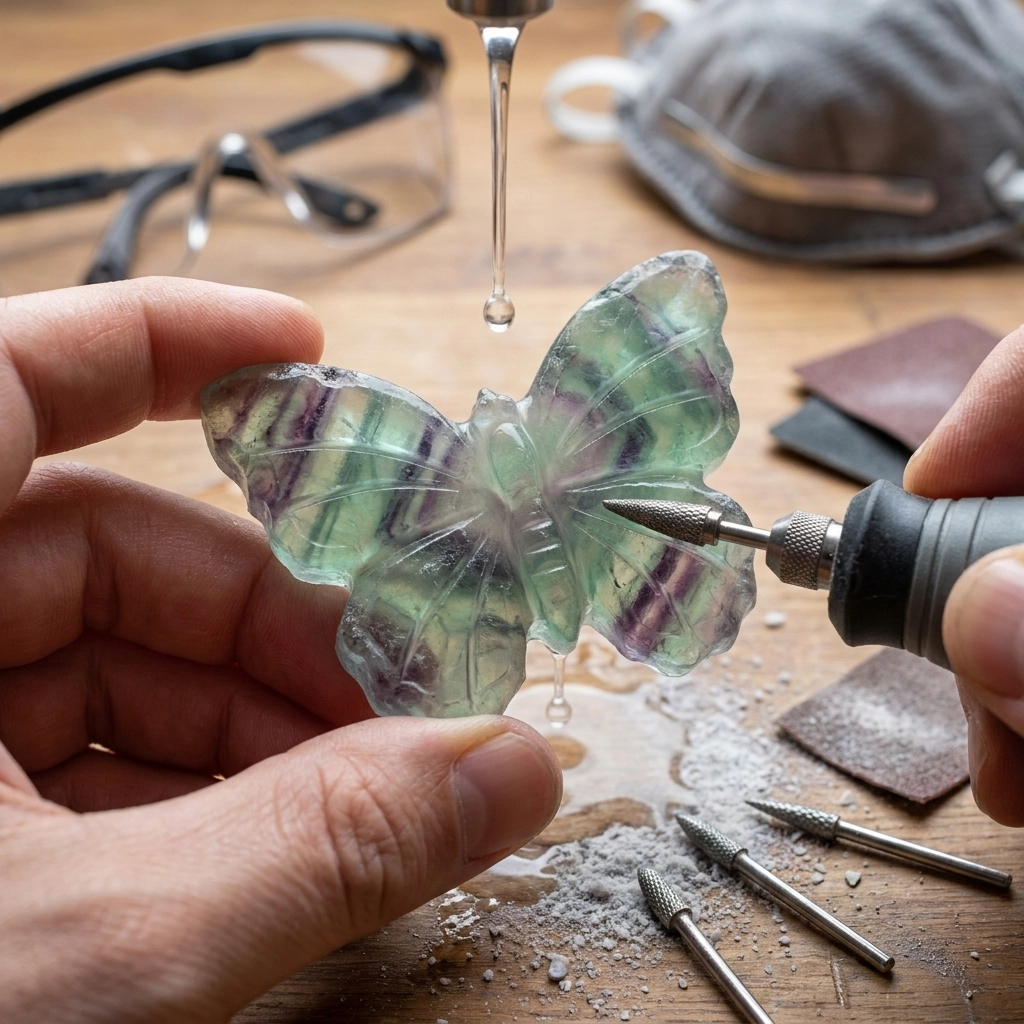
Sanding removes the scratches left by shaping. Polishing develops gloss on a surface that is already prepared. Separate those jobs: a polishing compound cannot reliably erase a deep bur mark, and pressing harder can round the wings or create heat without solving the scratch.
For sound agate or quartz-rich material, one possible progression is 220, 400, 600, 1,200, and 3,000 grit before a compatible final polish. Use this only as a starting example. Follow your abrasive system’s matched sequence, and test a finer starting abrasive for softer stone rather than automatically cutting it with coarse grit.
Work the broad faces with appropriately sized abrasives and use small rounded sanding points inside the recesses. Keep the abrasive moving across the intended curve. If you cannot reach a scratch in the central transition, use a smaller suitable point instead of flattening both wings to gain access. Follow each sanding product’s water and operating requirements.
After each grade, rinse the stone, support, hands, and tools before introducing the next abrasive. Inspect the clean surface dry with side lighting, then re-wet it before further wet grinding. Move on only after the previous scratch pattern has disappeared from the faces, edges, and recesses. Water can temporarily conceal marks that remain obvious on a dry carving.
Choose the final polishing compound and carrier for the actual material. A supplier-approved fine diamond system is one option for quartz-rich stone, but it should not become an automatic recipe for fluorite, calcite, opal, or mica-rich material. Follow the compound’s lubricant directions and test the complete combination on your offcut.
Keep separate, labeled pads or tips for each polishing grade. Inland Craft’s pad guidance warns against mixing polishing media on the same pad. Use light pressure and short working periods, checking the stone for warming. Let it cool gradually if it warms; do not plunge a warm carving into cold water.
For pink opal, take temperature control especially seriously. GIA’s opal-care guidance notes that heat and sudden temperature changes can cause fractures. Keep the wing edges substantial and judge the finish after cleaning and drying, without oil or a coating that temporarily disguises scratches.


Fix common problems and care for the carving
A wing tip chips. Stop and inspect the surrounding area. If the damage is shallow and the remaining stone is sound, redraw a slightly rounder outline and blend the matching wing for balance. A crack reaching the central connection requires reassessment, not more grinding to chase the last chip.
One colored patch stays dull. First distinguish remaining scratches from a softer, more porous, or differently textured area. Mixed-material rough may finish unevenly. Revisit an appropriate sanding grade and test your polishing method locally. Persistent pits or grain loss are reasons to stop and consult an experienced lapidary.
The center looks like a deep saw cut. Smooth its edges into the wing faces with a suitably rounded fine abrasive, provided enough material remains. Do not deepen the channel to make it look more dramatic. The reference effect depends on a gentle change in surface angle and reflected light.
The butterfly rocks on the table. Mark its contact points and refine only the necessary high areas on the back. Check repeatedly on a flat surface. You need a stable resting position, not an aggressively flattened underside that removes support from beneath the middle.
Can a rock tumbler make this shape? No. Tumbling rounds surfaces through repeated contact and cannot selectively cut the four-wing outline. It can also damage an already carved center or tip. Use controlled carving and polishing; our rock tumbling guide explains that separate process.
Clean the butterfly using a method appropriate to its identified stone and treatments. Avoid steam, ultrasonic cleaning, and harsh chemicals for an unverified mixed-stone collection. Lift each piece around its thicker center, store it separately from harder stones, and display it where thin edges cannot be knocked against other objects.
To make a coordinated collection, reuse the silhouette and side-profile checks while adjusting your technique for each material. Let the natural bands provide the decoration. For another carved-stone project, explore our ocean jasper seahorse carving guide; for a simpler sculpting project, try DIY clay worry stones.
 Love Rock Tumbling?
Have a question? Use the form above to submit your question or comment.
I love hearing from you and seeing what you made!