

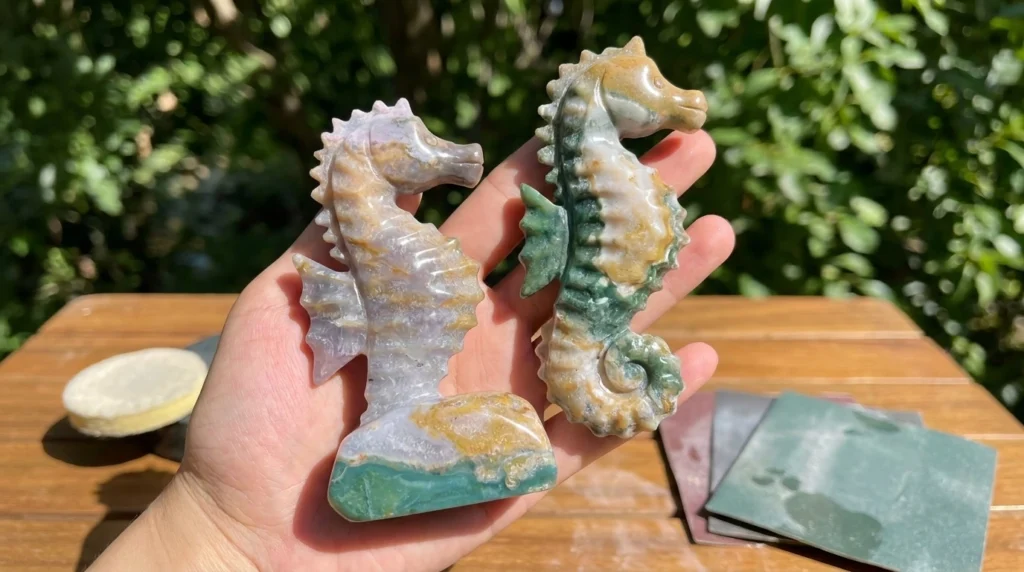
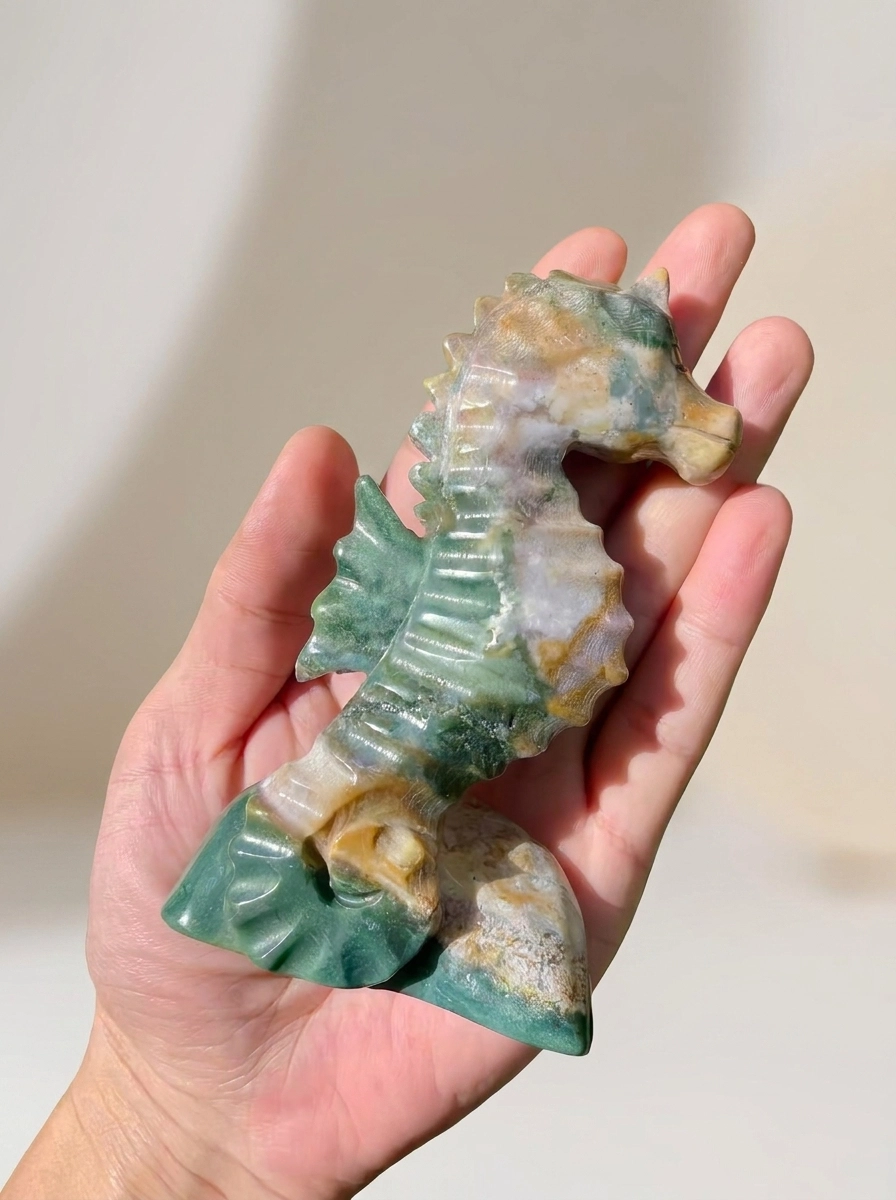
An ocean jasper seahorse carving combines two projects: shaping a recognizable sea animal and revealing the patterns inside natural stone. This guide explains a practical lapidary approach to the seahorses in the linked reference listing, including the curved neck, ribbed body, pointed rear fin, curled tail, and broad standing base.
The LuminaCrystalsGoods Etsy listing identifies the material as ocean jasper and lists dimensions of 4 inches high, 2 inches wide, and 1 inch deep, approximately 102 × 51 × 25 mm. Those are the seller’s specifications, not measurements taken from these photographs.
You can aim to reproduce the design closely, but an exact copy of its natural green, cream, lavender-gray, and ochre patches is impossible. The method below is a proposed reconstruction from the visible shapes, not the maker’s disclosed process or a documented workshop test. The images illustrate the design and workflow; they do not document a tested build.
Project level: Intermediate to advanced lapidary work. Plan several workshop sessions, including a practice offcut; the time depends on the rough, tools, and your experience. If you have never used a lapidary saw or carving handpiece, learn those operations with an instructor before attempting the narrow neck and fin.
Images supplied by the blog owner illustrate the finished design and key stages of the carving workflow.
Plan your ocean jasper seahorse carving
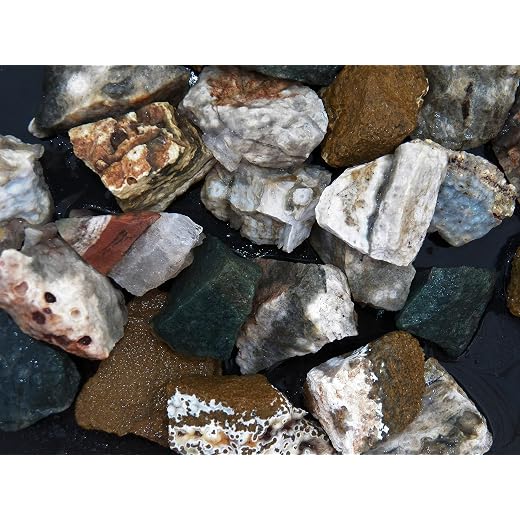
Start with sound ocean jasper rough or a thick slab from a supplier who can explain its identity and any treatments. A photograph alone cannot authenticate a stone. GIA’s discussion of orbicular jasper from Madagascar describes its varied colors and quartz composition, but it does not identify this particular listing’s specimens.
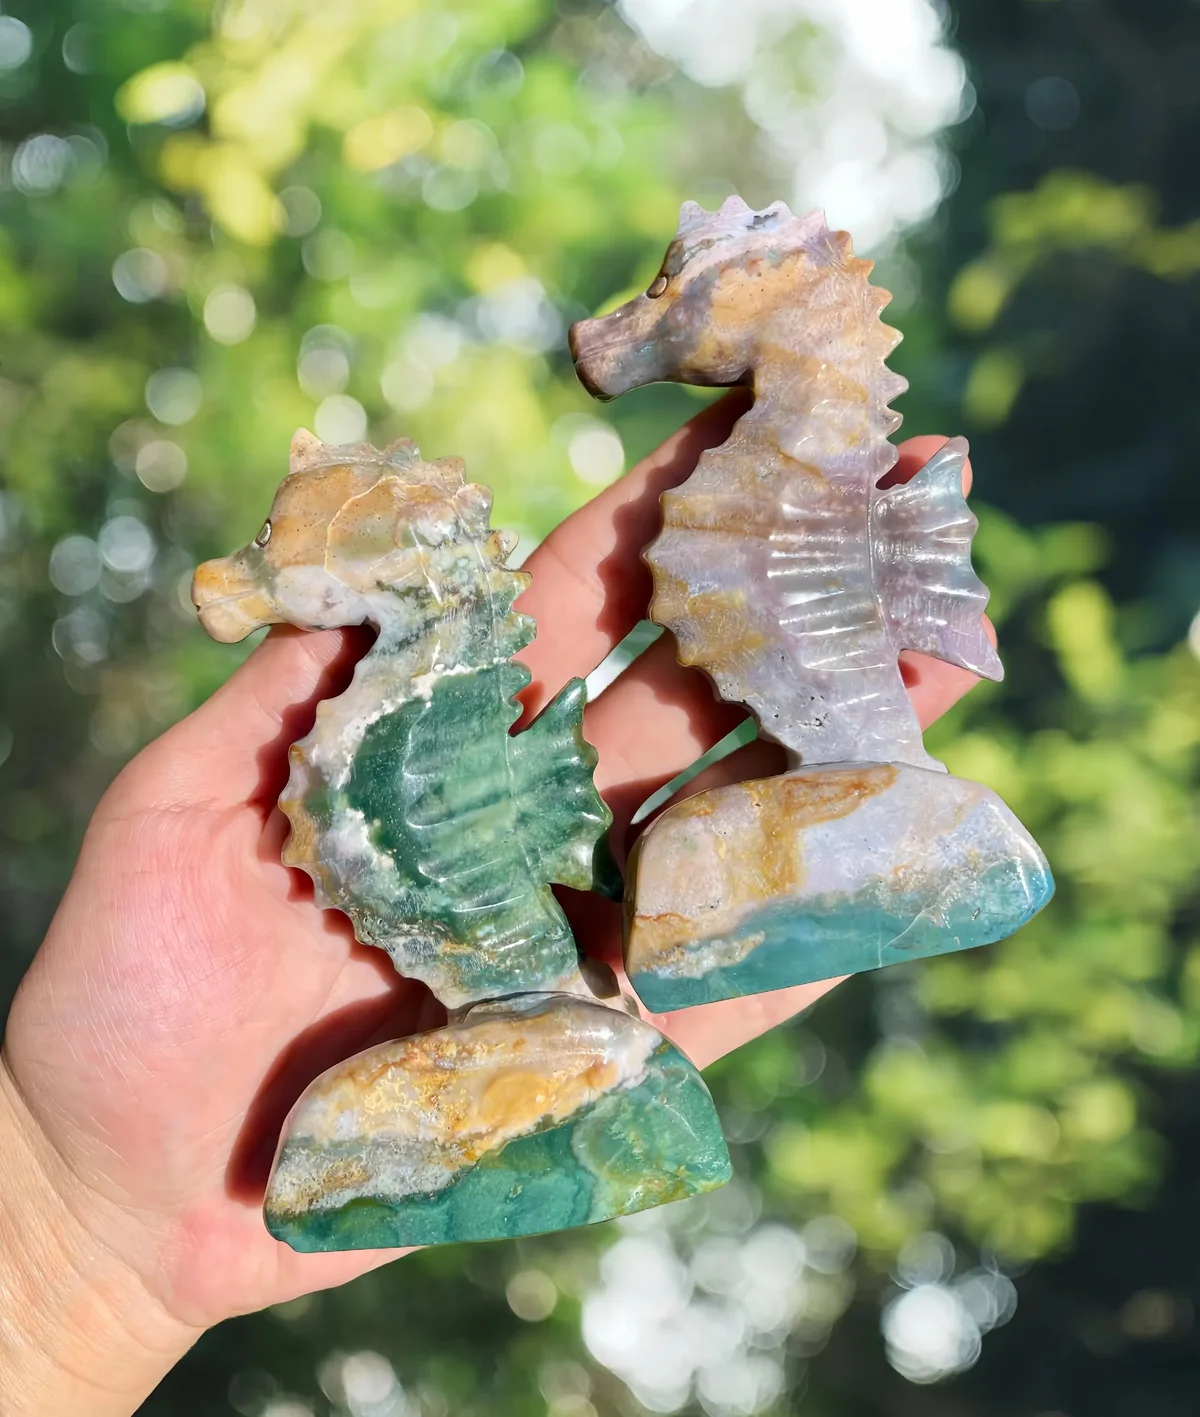
Choose the rough for both color and strength. For the greener example, look for a broad green area that can run through the belly and lower base, with paler material around the head. For the lighter example, orient cream or lavender-gray material through the upper body and retain green near the bottom. These are two color variations of the same basic carving.
Wet the surface for a preview, then inspect it dry under angled light. Avoid a fracture crossing the future neck, tail connection, or fin root. Do not mistake every pale vein for a crack: look for an actual opening or discontinuity. If uncertain, have an experienced lapidary examine the blank before cutting.
For a roughly 102 mm finished figure, a blank around 115 × 65 × 30 mm offers a starting allowance, provided the outline fits sound material. This is a suggested working size, not the seller’s blank size. Ask your supplier to prepare it if your saw cannot safely accommodate that thickness.
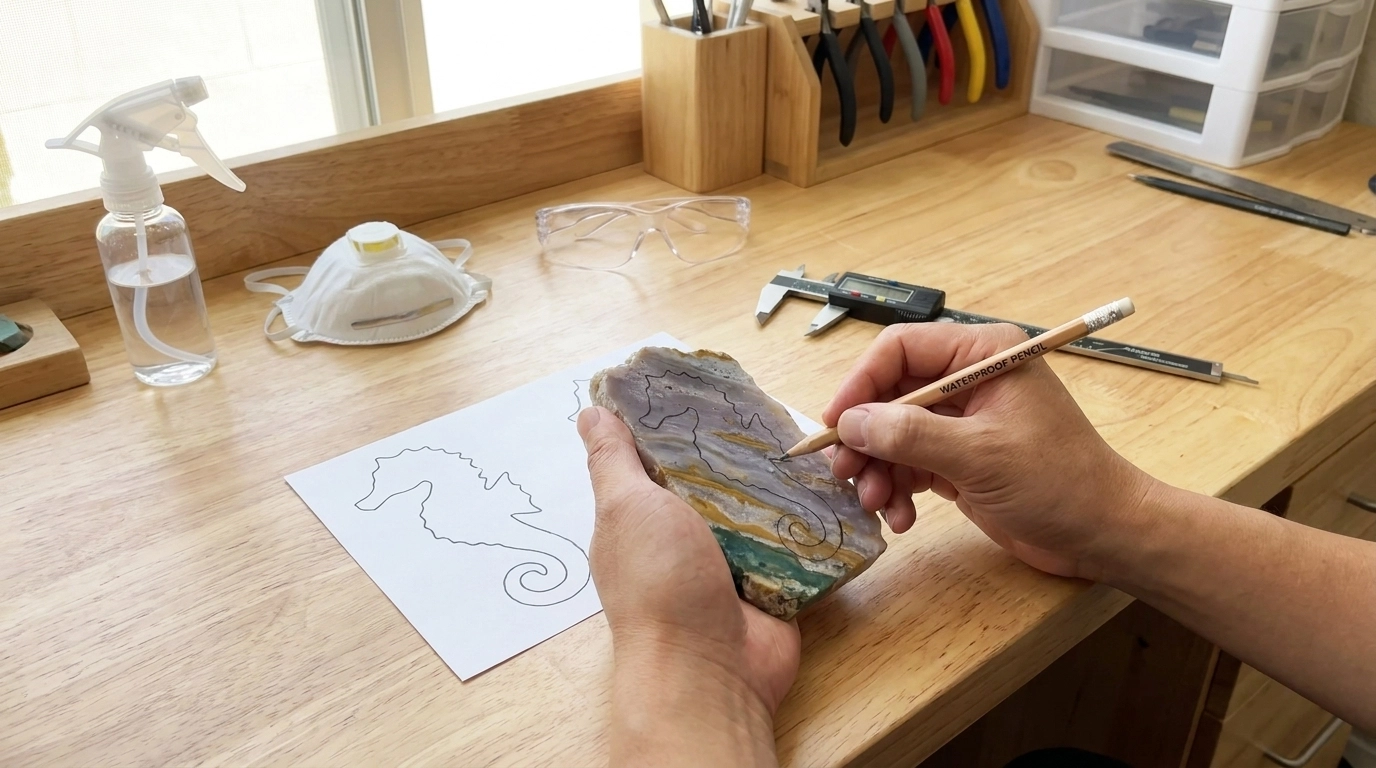
Draw the silhouette at full size on paper. Place the head in the upper quarter, let the curved neck open into the rounded belly, and reserve roughly the bottom fifth for the tail and base. Trace the chosen reference’s outline, keeping its orientation consistent; photographs of opposite faces naturally reverse the direction of the snout.
Use the drawing as a visual guide, not a dimensionally exact plan: camera angle changes apparent proportions. Transfer it to both broad faces with the outline mirrored on the reverse. Mark a centerline around the edges to help keep the carving balanced through its thickness.



Ocean jasper seahorse carving tools and safety
- Cutting and shaping: A lapidary saw sized for the blank, a wet grinding setup, and a carving handpiece explicitly suitable for the intended wet-work arrangement.
- Detail tools: Compatible diamond ball, rounded cylinder, and tapered burs; small wet-use sanding or polishing points; and diamond hand files for controlled refinement.
- Finishing: A compatible progression of abrasives, dedicated polishing tips or pads, and a lapidary polish recommended for quartz-rich material.
- Bench supplies: Ruler, calipers, waterproof marking pencil, magnification, good lighting, a suitable work support, splash containment, and slurry collection.
Use the tool and abrasive manufacturers’ speed limits, water requirements, and mounting instructions. Diamond Pacific’s carving-bur guidance specifically requires water for these diamond burs. A wet-rated bur does not make an ordinary electrical rotary tool waterproof; have the complete setup approved for the job and keep electrical connections protected.
Cutting quartz-rich stone produces hazardous silica dust. Use effective water delivery at the cutting point and appropriate local extraction; work in a dedicated lapidary area. Wear eye protection, use hearing protection where required, and follow the workshop’s exposure assessment for properly selected and fitted respiratory protection. A face covering is not a substitute for dust control. OSHA’s silica guidance also warns that exposure can occur without visible dust.
Secure hair and loose clothing. Support the thick body or base, keeping hands clear of rotating tools. Clean slurry before it dries using wet methods or suitable HEPA equipment, never dry sweeping or compressed air. Keep slurry out of household drains and follow local disposal requirements.

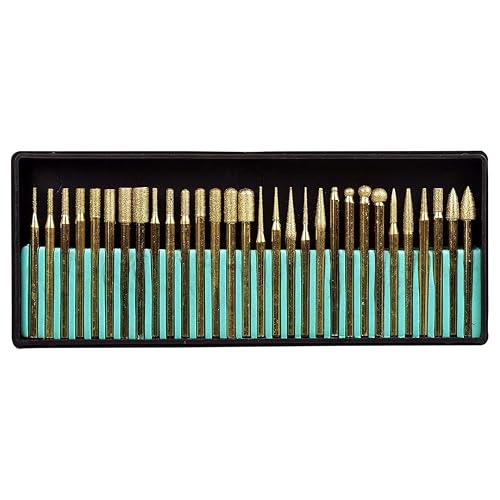

Cut and shape the seahorse
Begin with a practice offcut. Try a shallow groove, a rounded edge, and a small polished patch using your intended tools. This reveals how the material chips and whether different colored areas finish evenly. Adjust your approach before risking the main blank.
Rough-cut the outside silhouette with straight, controlled cuts that stay approximately 2–3 mm outside the drawn line. Keep the neck opening, crest notches, and tail recess largely filled at this stage. Never force a circular saw blade around a tight curve or twist the blank against it.
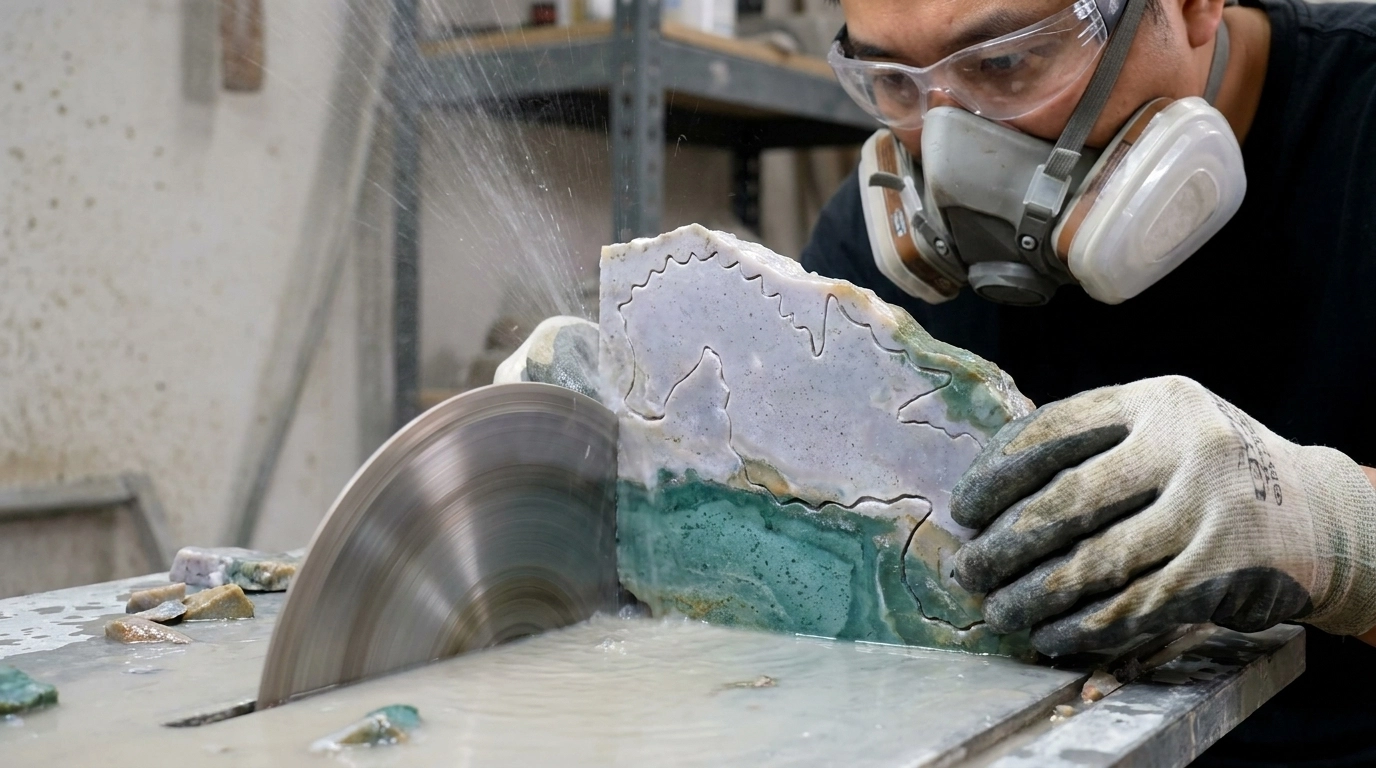
Remove excess material gradually with wet diamond grinding. Alternate between the two broad faces so the silhouette stays aligned. Preserve an oversized fin, a thick neck, and generous stone connecting the lower body to the base. Do not use impact or snap waste off beside a delicate feature.
Flatten the underside enough to establish the standing direction, while leaving material for final leveling. Place the carving on a stable surface between operations to check its posture. The head and belly should sit above the base’s footprint rather than leaning beyond its edge.
Form the head, neck, and belly
Round the broad faces into a gently convex body. Keep the belly fuller than the neck, with smooth transitions instead of abrupt shoulders. Work in light passes and inspect both faces frequently; the strongest color on one side can distract you from uneven shaping on the other.
Open the C-shaped space beneath the snout using a suitably sized rounded diamond bur. Approach from each face in shallow passes until the opening meets cleanly. Stop to recheck the neck thickness instead of chasing the final outline immediately. Leave extra material if the stone contains a questionable vein.
Shape a short, blunt snout with rounded upper and lower edges. The reference has a horse-like head and a compact muzzle, rather than a long needle-shaped nose. Preserve the cheek’s fullness and leave enough stone above it for the crest points.
Use calipers to compare corresponding areas, but do not thin everything to one measurement. The body, neck, and fin need different profiles. No single minimum thickness guarantees strength in natural stone; visible flaws and the direction of stress matter more than matching a number.
Carve the curled tail and rear fin
Narrow the lower body gradually into a thick tail that curls toward the belly and meets the broad base. Mark the curl first as a shallow channel. Deepen it only where the reference shows a recess, preserving the surrounding stone that supports the figure.
Compare both faces before opening any apparent hole. A dark area in a photograph may be a shallow recess, shadow, or an opening viewed at an angle. Reproduce the visible curl without turning it into a fragile, unsupported ring just to imitate a shadow.
The rear fin projects from the back of the body as a compact fan. Shape its outer silhouette while retaining a broad root, then taper its faces gently toward a rounded edge. Keep the junction with the body substantial; do not undercut it into a thin tab.
Blend the base into the curl and give its upper surface the uneven, rock-like contour seen in the photos. Keep its underside flat and sufficiently broad for standing. This integrated base is part of the blank, rather than a separate pedestal glued onto the finished tail.
Add the crest, ribs, and facial details
Draw the details on the shaped surface before touching it with a fine bur. Check the overall silhouette at arm’s length first. Tiny grooves cannot correct an oversized snout or a neck that is too straight, and polishing will soften every small feature slightly.
Crest and belly scallops: Mark a row of short, rounded triangular points along the crown and rear neck. Cut shallow valleys between them with a rounded or tapered bur that fits the space. Shape the belly’s scalloped edge separately, following the reference face. Keep the points blunt enough to survive handling.
Body ribs: Sketch gently curved transverse lines across the body and down the tail. Space them by eye against the chosen reference, adjusting as the body narrows. Carve shallow channels so the uncut bands between them become raised ribs. Do not saw deeply across the neck or tail connection.
Work corresponding sections on both faces, then soften the channel edges. A rounded groove reflects light more like the reference than a sharp scratch. Keep each recess wide enough for a finer abrasive to reach later; an inaccessible coarse groove will remain dull.
Fin rays: Add a few shallow grooves that spread outward from the fin root toward the rim. Stop short of the edge and retain a continuous border. The lines suggest a fan without dividing the fin into individual brittle fingers.
Eye and mouth: Make a small, shallow circular eye recess in the visible position behind the snout. The photographs show a dark eye accent, but do not establish whether it is an insert, surface treatment, or carved detail. A polished recess is a conservative way to suggest it; do not assume a drilled bead socket is required.
Cut a short, shallow mouth line across the snout, keeping the muzzle joined as one piece. Refine its rounded end and the cheek transition with a fine bur. Resist adding nostrils, scales, or other details that are not clearly visible in your selected reference.
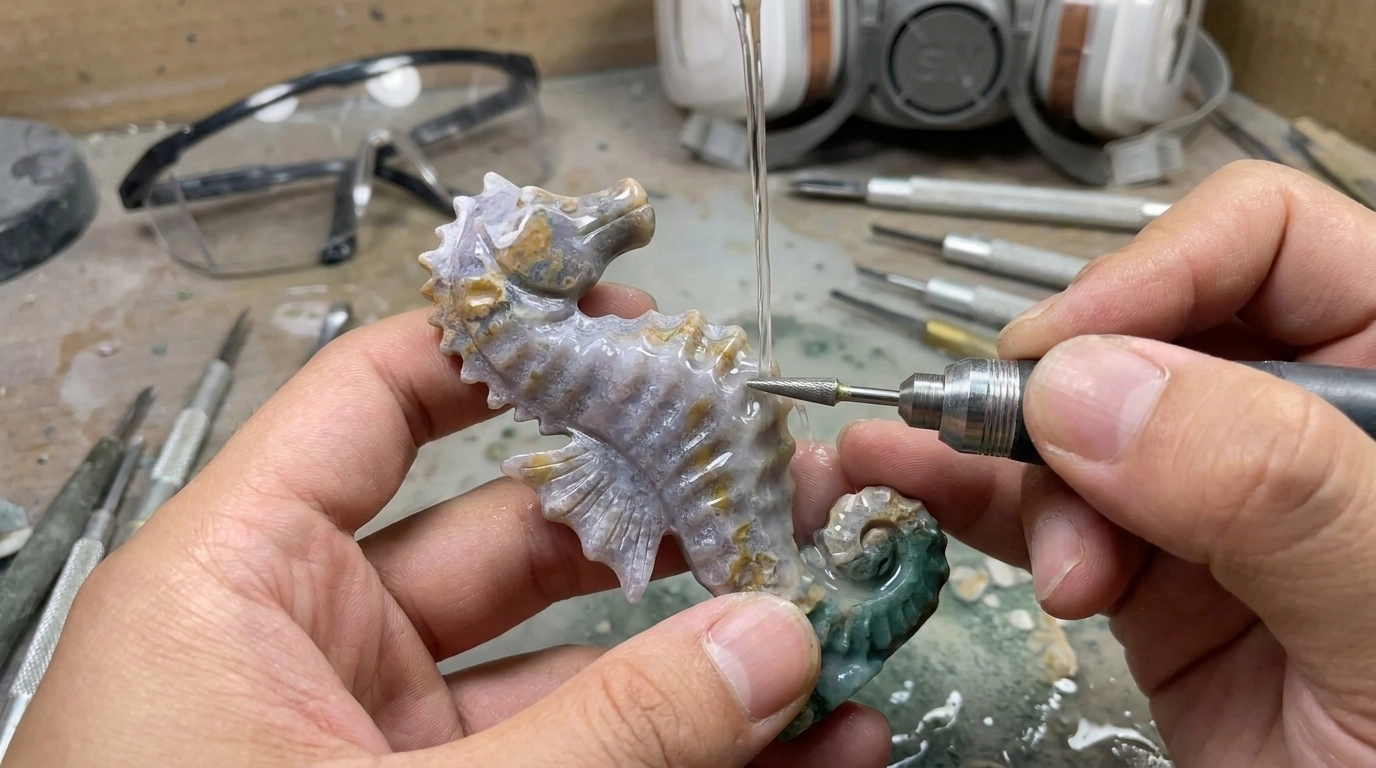
Sand and polish without losing the details
Shaping ends when the proportions, recesses, and base work together. Sanding then removes the tool marks while preserving that geometry. Do not expect a polishing compound to erase deep scratches left by a coarse carving bur.
A possible diamond progression is 220, 400, 600, 1,200, and 3,000 grit, followed by a compatible final polish. Treat this as a starting sequence: abrasive systems use different grades, and your supplier’s matched progression takes priority. Begin coarse enough to remove existing damage, then advance only when the previous scratches are gone.
Use broader abrasives on the belly and base, and appropriately shaped small points in the grooves. Wet-use products need their specified water supply; Diamond Pacific’s Nova-point instructions require water and eye protection. Keep pressure light, particularly on the crest and fin.
After each stage, rinse the carving, tools, support, and splash area to prevent coarse particles reaching the next abrasive. Inspect the clean surface dry under angled light and magnification, then re-wet before further grinding. Water can hide scratches that become obvious once the piece dries.
Support thin areas close to where you work, without squeezing them. Let the abrasive reach into a channel rather than flattening the surrounding ribs to get access. If a recess remains scratched, return to the appropriate sanding stage with a smaller tool.
For the final gloss, use a quartz-compatible lapidary polishing system tested on your offcut. Fine diamond compound on a compatible pad or tip is one option. Follow its carrier and application directions; do not add water indiscriminately to an oil-based product or change the tool’s permitted operating method.
Keep a separate, clearly labeled pad or tip for each polishing grade. Inland Craft’s polishing-pad instructions warn against mixing media or grits on one pad. Work briefly and lightly, checking for heat and preserving the edges. Stop if the piece becomes noticeably warm.
Wash away residue with water, mild soap, and a soft brush suitable for the stone and any disclosed treatment. Dry it completely before judging the result. Assess the shine without oil or a surface coating, which could conceal scratches and change the natural finish you are trying to reproduce.


Troubleshoot the finish and display your carving
| Problem | What to do next |
|---|---|
| Shiny when wet, dull when dry | Reinspect for scratches and return to the sanding stage that removes them. Adding polish alone will not level deep marks. |
| A crack appears near the neck or fin | Stop carving that feature. Have the piece assessed; shortening the feature or choosing another blank may be safer than thinning around the crack. |
| White residue remains in grooves | Gently clean the recesses with a soft brush. If the white area remains, inspect for unpolished scratches or natural pale material. |
| The base rocks or tips | Mark the contact points and level the underside gradually, checking posture often. Preserve enough base beneath the figure. |
| Colors differ from the reference | Reorient the design before cutting, or choose different rough. Polishing reveals existing patterns; it cannot relocate green or lavender areas. |
Can you make this with a rock tumbler? A tumbler cannot create this silhouette, and tumbling the finished carving risks rounding its ribs and breaking projecting parts. Use controlled carving and targeted polishing. Our rock tumbling guide covers a separate process for loose stones.
Can you substitute clay or resin? Either could imitate the outline and colors, but the result would be a replica in another material. To make the natural-stone project described here, start with verified rough and suitable lapidary equipment. For a simpler sculpting project, try our DIY clay worry stones tutorial.
How close should the two examples match? Use the same paper silhouette and compare head length, belly shape, fin position, and base width. Let each blank’s natural pattern determine the color distribution. That preserves the shared design without pretending two pieces of ocean jasper are identical.
Lift your finished seahorse by its body and base, never by the snout or fin. Display it on a level, secure shelf and dust it gently. Photograph both sides in soft daylight: the changing mineral patterns and carefully polished ribs are the details that make the finished carving worth studying.
 Love Rock Tumbling?
Have a question? Use the form above to submit your question or comment.
I love hearing from you and seeing what you made!