

Choosing the right material shapes every stage of rock tumbling. A rock tumbler cannot turn every attractive stone into a smooth gem. Soft surfaces, open pores, cracks, and gritty textures may break down early and spoil an entire batch.
This guide helps beginners compare hardness, density, size, and texture before loading a tumbler. Agate, jasper, quartz, and petrified wood offer a reliable starting point. Agate remains popular because it combines vivid colors, natural patterns, translucence, and a bright polish.
You will also learn how to pair stones with similar strength and shape. The four-stage process covers coarse grit, water, barrel fill, cleaning, and final polish. Each choice affects results and the time needed to create smooth pieces.
Commercial tumblers became widely available in the 1950s and 1960s. Today, people can follow proven methods while testing local finds or purchased material. Drawing on guidance from geologist Hobart M. King, this guide makes each batch easier to plan and improve.
Best Rocks for Tumbling: What Makes a Stone Suitable
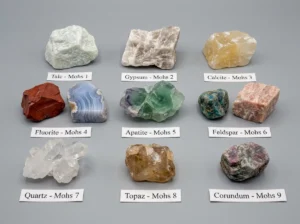
A suitable piece has the right hardness, a dense body, intact surfaces, and a smooth texture. These traits help the material survive each stage of the process. They also reduce scratches, grit buildup, and uneven wear inside the tumbler.
Hardness, Density, and Smooth Texture
Most useful pieces fall near 6 to 8 on the Mohs hardness scale. This range lets abrasive grit shape edges while preserving the core. Dense rocks without pores keep coarse and fine grit from hiding inside small openings.
- Reject pieces with deep cracks or fragile edges.
- Rub each piece against another surface and watch for granular debris.
- Avoid hollow areas that can carry grit into the final polish.
- Choose smooth surfaces that resist flaking during rock tumbling.
Why Durable Silicate Rocks Polish Well
Agate, jasper, quartz, chalcedony, and petrified wood contain durable silicate minerals. Their tight structure supports steady polishing and a bright finish. Wood preserved with silica can also develop attractive color and pattern.
Materials above 8 may seem tougher, yet abrasives cut them slowly. That can extend the cycle without producing a clear polish. Careful selection gives the tumbler a balanced load and more consistent results.
Understanding the Mohs Hardness Scale for Rock Tumbling
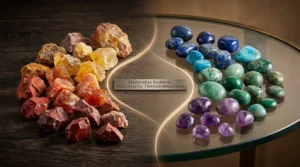
The Mohs hardness scale ranks minerals by their resistance to scratches, not their total strength. It runs from talc at 1 to diamond at 10. This simple scale helps predict how a stone may respond inside a barrel.
Many agate, jasper, quartz, chalcedony, and petrified wood pieces fall near Mohs 6–7. That range suits the abrasive process used in a rock tumbler. It also limits surface wear when similar stones share one load.
Testing Rock Hardness at Home
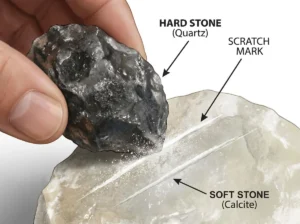
Use a steel nail, which measures about 5–5.5, as a quick test. Press its tip across an unseen area. If the nail leaves a mark, the sample may be too soft. A quartz fragment offers a stronger comparison and can scratch material below about Mohs 7.
- Test several spots on each rock.
- Check stones for cracks, chips, or hidden voids.
- Separate soft pieces before tumbling begins.
Remember: hardness does not equal fracture resistance. A hard sample can still split or chip. These checks help protect grit, energy, and weeks of time while giving rock tumblers a clearer guide.
Best Beginner Rocks for Tumbling
New beginners can start with durable materials that stay intact through each stage. Jasper and agate lead the list because they are affordable, colorful, widely available, and easy to inspect. A rock tumbler can shape sound pieces into smooth stones with steady care.
- Jasper: durable, colorful, and low cost.
- Agate: patterned and ready to accept a bright polish.
- Quartz: available in many attractive colors.




Agate and Jasper
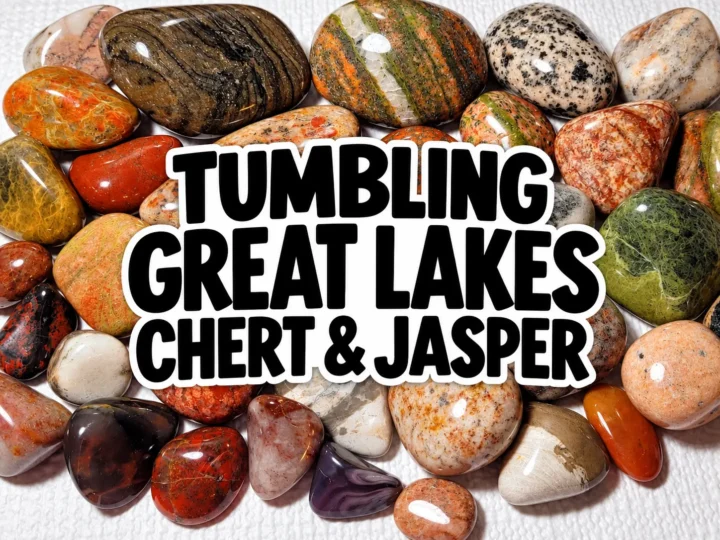
Jasper is an opaque or semi-translucent quartz variety. It appears in red, yellow, orange, brown, gray, white, and green colors. Its durable surface suits new users. Agate often shows bands, eyes, clouds, plumes, or moss. Its translucent pattern can take a bright polish.
Quartz and Chalcedony
Quartz comes in clear, white, rose, smoky, amethyst, and aventurine forms. Chalcedony is cryptocrystalline and gives polished stones an even look. Choose pieces without visible fractures or voids.
Petrified Wood
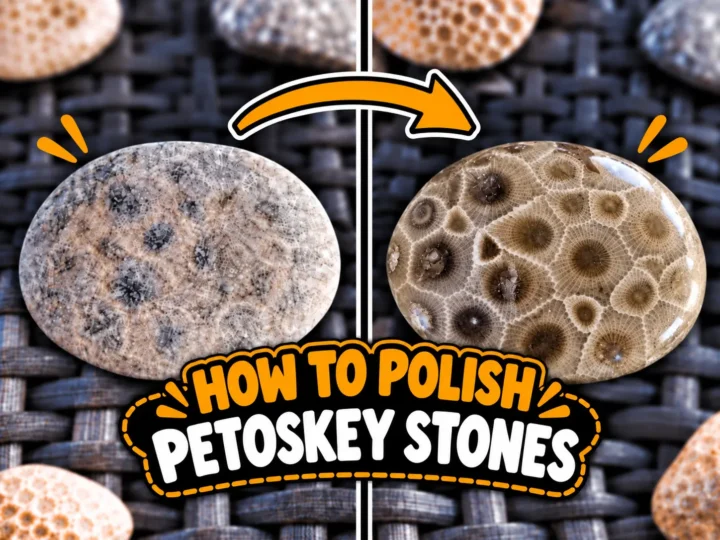
Petrified wood may preserve bark, cell walls, growth rings, and fine plant structure. Properly sized pieces can deliver satisfying results in about four to six weeks. Similar Mohs hardness within one load supports steady progress.
Rocks to Avoid in a Rock Tumbler
Some attractive specimens fail quickly inside a barrel. Soft rocks such as limestone, calcite, gypsum, and soapstone often rank between 1 and 4 on the hardness scale. They may turn into mud, form pits, or resist a smooth polish.
Layered materials also create problems. Shale, slate, and schist can split or shed thin flakes during the process. Sharp edges may scratch other stones and spread unwanted debris through the grit.
- Porous pieces: Sandstone and weathered granite can hold grit in tiny openings.
- Fractured pieces: Deep cracks may cause breakage before the polish stage.
- Obsidian: Its 5–6 hardness, conchoidal fracture, and low toughness make chips and bruises common.
- Feldspar: Amazonite, moonstone, labradorite, and sunstone have cleavage planes that invite breaks.
Experienced users may try feldspar with cushioning media and careful checks. Beginners should start with durable quartz or jasper instead. A cautious tumbler load protects grit, the machine, and finished stones.
How to Pair Rocks for Consistent Results
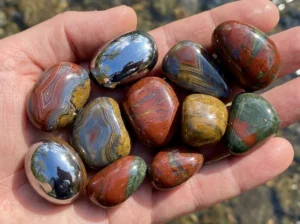
A balanced batch helps each piece wear at a similar rate. During rock tumbling, group items within about one Mohs hardness point. This simple step supports even shaping and reduces stress on the barrel.
Match Hardness and Material Types
Quartz-based materials usually work well together. Agate, jasper, chalcedony, and petrified wood share similar durability. Their matching structure helps the tumbler produce smooth stones with steady results.
- Use similar hardness: Keep soft and hard pieces in separate batches.
- Group compatible materials: Pair dense stones with related mineral types.
- Run glass alone: Glass grinds at a different rate and needs gentle cushioning.
Prevent Scratches and Grit Contamination
Soft calcite mixed with hard agate may develop pits, flat spots, and excess slurry. Hard edges can also leave scratches on softer surfaces. Porous material may trap coarse grit, then release it during polishing.
Separate brightly colored pieces when residue could stain nearby surfaces. A clean barrel and careful sorting protect the rock tumbler, improve polishing, and help people achieve a more even finish.
Choosing the Right Rock Size and Barrel Fill
Size controls how freely each piece moves, collides, and exposes its surface to grit. A small barrel holding less than two cups of water suits rocks from about 3/8 inch to 1 1/4 inches. This range helps edges wear without causing harsh impacts.
Beginner barrels with a one- to three-pound capacity usually handle stones from 1/2 inch to 1 1/2 inches. Pieces above 1 1/4 inches may thump instead of roll. They can slow the process and wear unevenly over time.
- Fill level: Keep the barrel one-half to two-thirds full.
- Load balance: Use about 25–40% small fillers or ceramic media.
- Stone ratio: Let medium and large pieces make up 60–75% of the load.
- Movement check: Confirm that rocks tumble freely when the tumbler turns.
This setup gives a rock tumbler steady contact between grit, water, and stone surfaces. Rock tumblers also run more smoothly when empty spaces stay limited. Choosing right size and fill levels makes rock tumbling more even and predictable.
How the Rock Tumbling Process Shapes and Polishes Stones
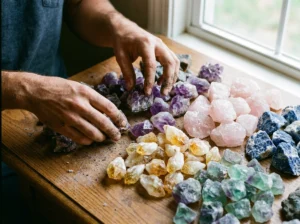
Each stage uses finer abrasive material and a cleaner surface. The process moves from rough shaping to smooth polishing. Most batches need several weeks, so steady checks help protect your time and improve results.
Coarse Grinding and Edge Removal
Start with 60/90 silicon carbide grit and enough water to form a thin slurry. This rough blend removes sharp edges, chips, and uneven areas. Run a rotary tumbler about seven to ten days, then inspect the stones.
Medium Grinding and Surface Smoothing
Next, use 120/220 silicon carbide grit. This stage erases deep scratches and refines the shape. Clean the barrel and stones before adding fresh abrasive. Quartz and other durable material often need another seven to ten days.
Pre-Polish and Final Polish
Use 500-size grit or aluminum oxide during pre-polishing. Every surface must be free of coarse residue first. The final step uses 0.3–1 micron aluminum oxide, cerium oxide, or tin oxide. Run it about five to seven days.
Rotary tumblers shape beginner loads well. Vibratory tumblers can finish polishing in days instead of weeks.
Rock Tumbling Grit, Water, and Cushioning Media
A smooth slurry helps each rock move evenly inside the barrel. Silicon carbide shapes stones during early stages. Use about two to four tablespoons of grit per pound of rocks. Add clean water until the mix looks like thin mud, not soup.
Too much water weakens contact between grit and stone. Too little water creates a thick paste that may slow the process. Aluminum oxide supports pre-polishing, while cerium oxide and tin oxide suit delicate final polishing. Final polish commonly needs four to six tablespoons per pound of rocks.
- Plastic pellets: Cushion stones and fill open barrel space. They may float during separation, but they absorb grit. Keep stage-specific batches apart.
- Ceramic media: Adds weight, lasts through many cycles, and does not absorb grit after thorough cleaning.
- Dry media: Corn cob and walnut shells can support dry polishing or burnishing when the tumbler type allows it.
Choose media that matches the material and goal. Clean tools between stages to prevent coarse grit from reaching the final polish.


Tips for Better Polishing Results Every Time
Clean handling often matters as much as abrasive choice. A careful routine keeps each stage separate and helps beginners avoid dull surfaces. One stray grain of coarse grit can leave visible scratches during final polishing.
Cleaning Between Tumbling Stages
After every seven- to ten-day stage, wash the stones, barrel walls, lid, and reusable media. Rinse away slurry with water, then inspect each piece under bright light. Remove rocks with new fractures, deep pits, or unfinished areas before the next load.
- Separate grit: Never carry coarse or medium abrasive into polish.
- Check movement: Keep the barrel half to two-thirds full so stones roll rather than strike.
- Record changes: Note media, water level, and cycle time after each run.
A rotary rock tumbler usually needs four to six weeks to complete the process. Each tumbler stage may run seven to ten days, while final polishing often takes five to seven days. Patient tumbling and clean equipment produce more consistent results. Written notes also show which load size and polishing steps deliver the smoothest finish.

Conclusion
The best rocks for tumbling are dense choices such as agate, jasper, quartz, chalcedony, and sound silica-rich wood. Their structure supports steady shaping and a bright polish.
Most fit a Mohs hardness range near 6–7. This scale helps similar pieces wear at a steady rate. Inspect each stone for pores, cracks, soft veins, and loose grit before loading the barrel.
Choosing the right rocks also means matching size and strength. Keep the barrel half to two-thirds full, add suitable media, and use clean water at every stage. Wash the barrel and stones between cycles.
Patience remains essential. A complete rotary process may take four to six weeks. With careful sorting, fresh abrasive, and steady checks, people can turn a varied load into smooth, durable stones and repeat reliable results.

 Love Rock Tumbling?
Have a question? Use the form above to submit your question or comment.
I love hearing from you and seeing what you made!