

Find Yooperlites by scanning suitable Lake Superior beaches after dark with a filtered UV flashlight. These gray rocks contain sodalite, which glows orange or yellow under ultraviolet light. Fluorescence is visible light emitted by a material after it absorbs ultraviolet light. In daylight, the stones look ordinary, so finding them takes the right light and a little patience.
For a first Upper Peninsula outing, pick a beach you can legally access and plan the route before sunset. Time, recent shoreline changes, and experience can affect what you find; no beach guarantees a discovery. A careful search is more enjoyable when you know how you will return to your vehicle and what the local rules allow.
This guide covers practical preparation, a repeatable search method, and safe, legal collecting. Treat the outing as a shoreline walk that needs daylight planning as well as a UV light.
How to Find Yooperlites: The Quick Answer
A filtered UV flashlight reveals the orange or yellow sodalite fluorescence in Yooperlites that look like ordinary gray stones in daylight. Look for localized bright patches, not a uniform glow across the whole rock. Erik Rintamaki discovered Yooperlites in 2017, bringing attention to fluorescent sodalite along Lake Superior.
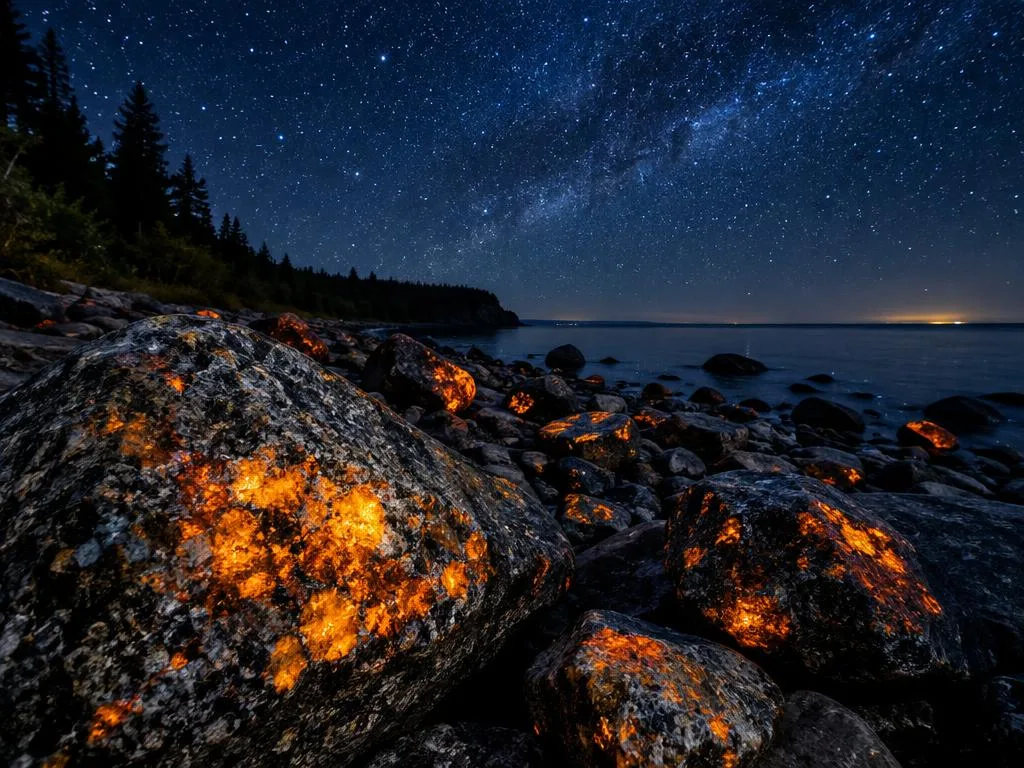
The mineral is the reason these stones stand out after dark. Under ultraviolet light, sodalite emits visible orange or yellow light. The surrounding gray rock does not need to glow evenly for a find to be promising. A patch or cluster of bright color is the useful signal to inspect.
Rintamaki’s discovery helped establish the name Yooperlites for these fluorescent rocks. A 2018 interview with Erik Rintamaki recounts how geologist Shawn Carleson identified the fluorescent mineral as sodalite using an electron microscope at Michigan Technological University.
The name can make the stones sound unusual, but the basic search is straightforward: find a suitable shore, use a filtered UV flashlight, and examine orange or yellow flashes. Daylight is useful for getting around and recognizing a rock’s gray host material, but it does not reveal the fluorescence well.
As you plan, separate the excitement of spotting a glowing patch from the decision to pick it up. Beach access and collecting permissions depend on the land manager, not on what the rock looks like or how easy it is to reach.
The light helps reveal the mineral, but it does not establish whether collecting is permitted at a particular beach.
Where Lake Superior Beaches Are Most Promising
Start with Lake Superior beaches in Michigan’s Upper Peninsula, particularly near Grand Marais or the Keweenaw Peninsula. These are promising areas, not guaranteed finds, and collecting rules vary by beach. Along shores of Lake Superior, focus your planning on public access and land boundaries rather than a pin that simply marks a rocky shoreline.
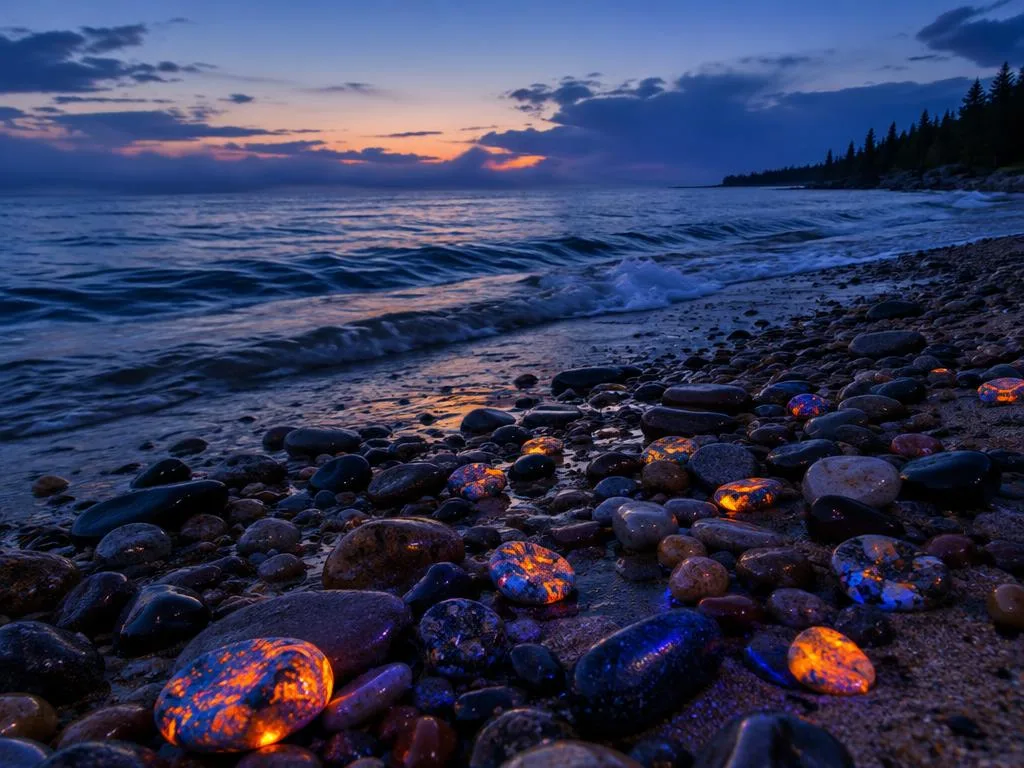
The Upper Peninsula shoreline is the best-supported broad area for finding the stones. Grand Marais and the Keweenaw Peninsula are especially notable for Yooperlites. The rocks can occur along Lake Superior’s shores, but the amount of exposed stone changes with weather and shoreline movement.
A map of where to find Yooperlites can help you plan a route, but a map pin does not prove that a beach is open to collecting. Mark public access points, check land boundaries, and identify the land manager before heading out. People asking where to find Yooperlite rocks near me should begin with that same local-access check.
Grand Marais and Agate Beach
Agate Beach in Grand Marais is a Burt Township park where collecting is allowed within Michigan’s 25-pound annual limit. That permission applies to this park, not every nearby stretch of shore. Just west of Grand Marais, Pictured Rocks National Lakeshore prohibits beach-stone collecting inside the lakeshore boundary.
For people looking for Yooperlites in Marquette, the broad search area remains Lake Superior’s Upper Peninsula shore. Do not assume a particular Marquette beach allows collecting just because it appears public or has parking. Check its boundaries and current rules before planning to take rocks.
The Keweenaw Peninsula and Other Pebble Beaches
The Keweenaw Peninsula offers another broad area to consider, along with other accessible pebble beaches on Lake Superior. Choose a location based on access, land ownership, and conditions, not on a promise that a certain stretch will produce stones. Even a productive beach can look different after waves or storms.
Purchased Yooperlites have a retail range of $60-$100 per pound, but this outing is about finding and collecting legally rather than shopping. Confirm the exact boundary and land manager for the beach you select before packing to collect.
Choosing a UV Flashlight for Fluorescence
Choose a filtered 365 nm UV flashlight to make the sodalite’s orange or yellow fluorescence stand out. A filtered 365 nm light shows Yooperlite fluorescence best. It is designed to reveal the fluorescent mineral, while a white flashlight helps you see the path, rocks, and people around you.
The 365 nm figure describes the light’s wavelength in nanometers. Ultraviolet light is invisible to human eyes, so you will not see the beam itself as you would see ordinary light. Its effect becomes visible when a material such as sodalite emits a colored glow.
Why a Filtered 365 nm Light Helps
UVA spans wavelengths from 315 to 400 nanometers, so 365 nm falls within that range. A filter reduces visible light from the flashlight, helping the orange or yellow patches stand out against a dim shoreline. The difference can make it easier to judge whether a small flash comes from a rock or another object.
A basic unfiltered type of UV LED flashlight may still reveal fluorescence, but the visible spill can distract from the glow. A filtered 365 nm UV flashlight is a practical choice when your goal is spotting fluorescent sodalite. Compare the light’s stated wavelength and filter rather than choosing by brightness alone.
Keep a Separate White Flashlight for Navigation
Keep an ordinary white flashlight in reach as a separate light source. Use it to see the route, uneven ground, and the way back toward your vehicle. A UV beam is not a safe replacement for a white beam when you need to move across a dark beach.
Switching between the two lights also gives you a clearer view of the rock itself. The UV flashlight reveals fluorescence; the white flashlight shows shape and surface detail. Carry a separate white flashlight because the UV beam is a poor substitute for ordinary navigation light.
Filtered 365 nm UV lights: These listings specify filtered 365 nm UV light; compare battery and beam features before choosing a beach light.




Scout the Beach Before Dark and Set a Return Plan
Walk the route before sunset so the beach entrance and return path are familiar in daylight. Set a clear route back to your vehicle before the light fades. Look at the beach’s layout, note the entrance, and choose landmarks you can recognize on the way back.
Darkness can make a familiar shoreline feel different, especially when you are concentrating on a UV flashlight. Make sure your return route does not rely on one small landmark that could be hard to spot. Keep your navigation light somewhere you can reach without emptying your pack.
Pack a few practical items before leaving home:
- A white flashlight and spare batteries for the route back.
- A glow stick to mark the beach entrance, placed well away from the water.
- Water and snacks for the time you expect to be outside.
- A bag for finds and grippy shoes that can get wet.
Set the glow stick above the waterline near the beach entry point, where it remains visible from shore. Do not leave it where waves can wash it into the lake. Shoes with good grip help on wet stones, and shoes that can get wet are more practical than footwear you need to keep dry.
A small bag gives you a place to put any rocks you are allowed to collect without carrying them loose. Water and snacks are useful if the search takes longer than expected, while spare batteries help keep both lights ready.
Keep the route marker above the waterline, where waves cannot carry it into Lake Superior.
White light and a return plan: A separate white headlamp and handheld flashlight help with navigation; a weatherproof notebook can hold your return plan.


When Spring and Fall Improve Your Chances
Spring and fall can bring newly exposed shoreline rocks as ice and storms reshape the beach. A changed beach surface can uncover rocks, but it does not guarantee more finds. Spring ice can shift shoreline stones, and storms can disturb or expose rocks along Lake Superior.
The useful part of these seasons is the change in the beach itself. A new patch of pebbles may appear where the last visit showed sand or larger stones. A storm can also move material away, leaving fewer exposed rocks in one area and more in another.
After a storm, a fresh surface may make rock hunting worthwhile if the shoreline is safe to reach. Do not treat the storm as a reason to hurry out while conditions remain rough. Waves, wind, and weather can continue changing after the clouds begin to clear.
Before leaving, check a few conditions that affect both access and the search:
- Whether recent waves or ice have changed the shoreline.
- The current weather and any forecast changes during your outing.
- Whether visible ice remains near the beach.
- Whether you can reach the beach without crossing hazards.
Visible ice deserves particular care in spring. Shoreline ice can shift, and a route that looks open from a distance may still put you near an unstable edge. Do not approach, climb on, or cross shoreline ice to reach a patch of rocks.
Fall can also bring shifts in exposed stones as storms move along the lake. Conditions vary from beach to beach, so the season is only one part of deciding when to go. Check the shoreline and weather close to your departure rather than relying on an earlier visit.
A recently changed beach is useful only when you can reach and search it safely. If wind or waves are building, or ice blocks the route, leave the rocks for another time. Skip a recently changed beach if the remaining ice or weather makes the shoreline unsafe.
Scan Slowly and Retrace Your Steps
Move slowly enough to scan each patch of shoreline before stepping past it. Patience matters more than speed when finding Yooperlites, because a quick sweep can miss a small orange or yellow flash among the rocks.
Keep the UV flashlight aimed toward the beach ahead, where its beam can reach the stones you have not yet passed. Move at a steady pace and give each patch of ground time under the light. A rushed search covers more distance but can leave promising rocks unseen.
Sweep the Beach at a Steady Pace
Hold the light where it can illuminate the ground in front of you, then sweep across the shoreline as you walk. Keep your steps short enough to avoid walking past a bright spot before noticing it. Stay focused on the safe route rather than trying to cover every part of the beach.
Pause Around Each Bright Flash
When an orange or yellow flash appears, stop and inspect the nearby rocks. Check whether the color comes from a stone or from another object on the ground. Looking around the initial flash can also reveal more than one rock with a similar patch of fluorescence.
The best way to keep the search orderly is to follow a simple sequence:
- Walk slowly with the beam reaching the beach ahead.
- Pause when a bright orange or yellow patch catches your eye.
- Inspect the nearby rocks before continuing.
- Retrace the searched path from a different angle.
Check Again From a Different Angle
Retracing your steps gives you another view of stones you already passed. Light angle can change what is visible, so a patch that did not stand out from one direction may look clearer from another. Turn or shift your position without leaving the safe route.
Rock hunting at night is easier when you resist the urge to hurry toward every flash. Take time to look, then decide whether a stone merits a closer check. Retrace only the ground already covered, keeping your attention on the safe route.
Identify Sodalite Fluorescence, Not Just Any Glow
In daylight, a Yooperlite looks like an ordinary gray rock, not a glowing marker. Look for gray sodalite-bearing syenite with localized orange or yellow patches under UV light. The gray host rock can resemble granite, and the fluorescent sodalite may cover only part of its surface.
What the Rock Looks Like in Daylight
Without ultraviolet light, the stone has no obvious glow that makes it easy to identify. That answers what Yooperlites look like in daylight: they look like ordinary gray rocks. Daylight can help you scout the beach and examine a rock’s shape, but it cannot reliably reveal its fluorescence.
People wondering how to find Yooperlites during the day can use daylight to learn the shoreline and notice promising gray stones. The fluorescent feature appears when the rock absorbs ultraviolet light, not simply from looking at it under the sun. A gray stone alone is not enough to confirm a find.
How to Check a Suspected Find
Under UV light, fluorescent sodalite appears in patches rather than as an even coat across the whole rock. It can glow whether the rock is wet or dry. If a suspected rock has a vivid patch, check the rock itself for gray host material and localized color.
Look at the stone from another angle before deciding what you have found. The shape of the patch and the way it sits on the gray host can help you judge whether the glow belongs to the rock. A 2018 Restless Viking interview describes Rintamaki’s discovery and the identification of sodalite in the fluorescent stones.
A glow alone does not prove that an object is a Yooperlite. Fishing line, clothing fibers, fish, frogs, toads, and spiders can also fluoresce. A bright strand or small animal may catch the beam, especially when you are scanning quickly near the water.
To spot a plausible rock, check that the glow is attached to gray syenite and appears in localized sodalite patches. Viewing it from another angle can help distinguish a rock from a loose object or animal. Treat an unexplained glow as a clue to inspect, not as identification by itself.
Protect Yourself Around UV Light and the Shoreline
A night search beside Lake Superior calls for a buddy, a shared plan and attention to changing water conditions. Go with a buddy and tell someone else where you will be and when you expect to return. Some Lake Superior beaches have weak or absent cell service, so do not rely on a phone to solve every problem.
Before you leave, share the beach location, your route, and the planned length of the outing with someone who is staying home. Agree on when that person should expect to hear from you. A buddy can help you keep track of the route and notice when conditions begin to change.
Ultraviolet light is invisible to your eyes, so do not stare into a UV flashlight beam. Never point the beam toward another person’s eyes. Handle it like a tool for viewing rocks, not a light to shine at faces or use for navigation.
Pay attention to weather and waves throughout the search. Conditions on a Great Lake shore can change while you are focused on the ground. Stay on stable shore, and do not step into the water to reach a rock that is beyond your footing.
If the wind rises, waves grow, or the ground becomes unstable, change your route or end the outing. A bright flash is not worth moving onto a risky section of beach. Give each other room to walk carefully, especially where wet stones can shift beneath your shoes.
Plan to leave together rather than splitting up to inspect separate areas. Keep your attention on the shoreline and the conditions around you, not only on the UV beam. If the shoreline or weather feels unsafe, end the search and leave together.
Check Collecting Rules and Access Hours
Whitewater waves are a warning sign, not an invitation to move closer to the water. Whitewater waves are at least 3 feet high and may signal dangerous currents. Observe the lake from shore, and do not wade into unsafe water to reach a rock or stone.
Stay at least 100 yards from Great Lakes piers, where dangerous currents and waves can occur. A rock near a pier is not worth moving closer to a hazardous area. Turn around rather than following a find toward a pier, unstable ground, or water that is unsafe to enter.
Whitewater waves at least 3 feet high may indicate dangerous currents. Watch the water from a stable place on shore and leave the beach if wave conditions make your route unsafe. A dark beach can make breaking waves harder to judge, so keep distance rather than testing the water’s edge.
Spring ice creates another shoreline hazard. Do not climb onto beach ice, and keep a safe distance from it when it remains along the shore. Ice can shift or break without warning, so do not approach it closely to reach a rock or use it as a path.
Choose a route that stays on stable ground and lets you turn back without crossing water or ice. If a find lies beyond a hazard, leave it there. Your search should stop at the safe edge of the beach, not continue because a rock looks promising.
Collecting rules and access hours are site-specific. A public-looking shore does not automatically allow rock collecting, and a place that permits collecting may still have limits on when you can enter. Check the land manager’s current rules and hours before setting out.
Keep at least 100 yards from Great Lakes piers and leave the beach if waves or ice make the route unsafe.
Inspect and carry permitted finds: A loupe, small bag and scale can help you inspect, carry and track only the stones you may legally collect.


Conclusion
Check the land manager’s rules before treating a public-looking shoreline as a collecting beach. Michigan’s 25-pound annual limit is not blanket permission to collect everywhere. On state land, including state parks, the limit is 25 pounds per person per year total for rocks, minerals, and invertebrate fossils. The same limit applies to public-trust shore below the ordinary high-water mark.
Pictured Rocks National Lakeshore prohibits rock collecting, including on its beaches. The Whitefish Point Unit of Seney National Wildlife Refuge also prohibits collecting and is open during daylight hours only. A nearby allowed beach does not change those site rules.
Before departure, check the land manager’s current site rules and access hours. Choose a permitted access point, check its hours and weather, and then plan the outing around a filtered UV flashlight.


 Love Rock Tumbling?

Have a question? Use the form above to submit your question or comment.
I love hearing from you and seeing what you made!